Healthy Potato Salad

In place of mayo, I used grainy dijon mustard (from Trader Joes) along with green onions, celery, fresh parsley & basil from our patio garden, lemon juice, EVOO and garlic. Basically blended everything together and poured it right over the cooked potatoes. The taste was light and refreshing with a nice kick from the dijon. So yum! I think if you reserve some of the cooking water from the potatoes and add it in, you will have a creamier base. But either way, this dish will be sure to please at your next BBQ or honestly as a healthy side dish!
Make a batch and keep it in the fridge to use a few days. I have brought this dish to a few BBQ's and always received delicious compliments! The best part is that it super easy and affordable too! Potatoes are rather inexpensive and the other ingredients you most likely have on hand!
Bring the side dish that everyone raves about and be sure to share with me on Instagram, Facebook or Pinterest as I love seeing your recreations!
Healthy Potato Salad
Recipe Here
Ingredients:
1 bag small red or multi-colored potatoes, quartered
1 tbsp dijon mustard
2 tbsp lemon juice
1/4 cup EVOO
1 bunch fresh parsley, chopped (or 2-3 tbsp dried)
1 bunch fresh basil, chopped (or 2-3 tbsp dried)
2 garlic cloves, chopped
3 celery stalks, chopped
1/2 cup green onions, chopped
Salt & Pepper to taste
Instructions:
1. After washing and quartering potatoes, place in a large pot and cover with water. Bring to a boil then let simmer until fork tender. Drain, reserve 1/4 cup water for a creamier base.
2. In a food processor add olive oil, parsley, basil, dijon, celery, onions, garlic, lemon juice, a sprinkle of salt & pepper and blend well.
3. Once potatoes have cooled, pour dressing over and mix well. If you want a creamier base to add in reserved cooking water a little at a time.
4. Sprinkle with additional fresh herbs and adjust seasonings as desired.
5. Can cover a refrigerate before serving. Store leftovers in an airtight container for a few days.
**recipe adapted from www.cookieandkate.com
Healthy Greek Salad
Mediterranean style food is one of my fav's! With all the bright colors (eat a rainbow, you always hear!) and with Summer here it's a little easier to get these veggies fresh too! There are backed research that the Mediterranean Diet works! Filled with veggies, fruit and fresh fish it is believed to reduce cancer, Alzheimers & Parkinsons! Plus it lowers your LDL cholesterol (the bad kind!) So why not give it a try with the yummy Greek Salad!?

And just how I like it, super simple! Plus the dressing I used is from Primal Kitchen - I am not a big fan of jarred dressing but I fully support Primal Kitchen as their ingredients are simple and you can actually pronounce them! All you need to make this salad is;
1 orange pepper, diced
1 cup cherry tomatoes, sliced
1/2 cup kalamata olives, sliced
1/2 large English cucumber, chopped
1 cup chickpeas
1/4 cup fresh feta cheese (more if you like!)
Fresh parsley
Primal Kitchen Greek Dressing (just use enough to cover and mix well!)
Feel free to switch up the veggies or use other colored peppers. But I love this combo and colors - looks so pretty and we do eat with our eyes!
Ingredients:
1 orange pepper, chopped
1 cup cherry tomatoes, sliced
1/2 cup kalamata olives, sliced
1/2 English cucumber, chopped
1 cup chickpeas, drained and rinsed
1/4 cup feta cheese (crumbled on top)
1/4 cup fresh parsley
1/2 cup Primal Kitchen Greek Dressing (more if needed)
Instructions:
1. Add all ingredients to a large bowl and toss gently. Pour dressing over right before serving.
2. Best eaten right away or save for a day or 2 in the fridge with no dressing. (dressing may make it soggy)
Vegan Creamy Tomato Soup
Confession. The first time that I made this soup, I tried it with cauliflower. I wanted to achieve that creamy tomato soup texture but without the added cream. And if I can sneak in extra veggies, why not! While it was ok, and I ended up eating the whole batch (over time!) I wasn't impressed with it enough to share with you. I needed to find another way to make this soup creamy and delicious!

If you have tried my Creamy Vegan Butternut Squash Soup or my Vegan Vodka Sauce, then you know that my secret creaminess ingredient is a can of full-fat coconut milk. Smacking my head like duh.....that's it! So this tomato soup is a spin-off of that! And all you need is;
1 can of San Marzano whole peeled tomatoes
1 small can tomato paste
2-3 garlic cloves, chopped
1 small onion diced
1 can full-fat coconut milk
1 cup vegetable stock (more if desired)
Salt & Pepper (red pepper flakes, fresh basil, oregano are all good options too)

That's it! After sauteing the onions and garlic in a little bit of olive oil, add in the tomato paste and loosen up a bit, then add the can of tomatoes breaking them up a little (no need to go crazy since we will blend it all together). Continue with vegetable broth and let simmer for a bit. Then add in the can of coconut milk and your desired seasonings.

Simmer a bit more than blend together with an immersion blender. If you don't have an immersion blender you can transfer the soup in batches into a blender. This will take a bit longer to do and make sure the soup is cooled first. If you don't have an immersion blender I highly suggest getting one. It makes it so much easier to blend soups!
Top off your soup with grated parm cheese, fresh basil or parsley or crouton. Pair it with an old fashioned grilled cheese for an awesome comfort meal that will take you back to your childhood days! I think even the kids will join you!

And as always this makes for great meal prepping and planning! It's a large batch so portion out for lunches or dinners all week. Also freezer friendly! This recipe is a winner!
Did you make this recipe? Be sure to share with me on Instagram, Facebook or Pinterest so I can see your creations! Use the #myfitlife so we can find it! If you enjoyed this recipe and would like more be sure to subscribe back on my homepage!
Ingredients:
1 28-oz can San Marzano Tomatoes
1 6-oz can tomato paste
1 can full-fat coconut milk
2-3 garlic cloves, chopped
1 small onion, chopped
2 tbsp olive oil
1 cup vegetable stock (more if desired)
salt & pepper
red pepper flakes, fresh basil, parsley, grated parm cheese (optional toppings)
Instructions:
1. Heat oil in a large stock pan, then add in onion and saute for a few minutes. Add in garlic, be sure not to burn.
2. Add in tomato paste and break up a bit. Pour in full can of tomatoes, breaking up tomatoes with the back of a wooden spoon a bit.
3. Pour in vegetable stock and bring to a low boil. Then add the can of coconut milk. Stirring occasionally.
4. Sprinkle salt and pepper and any other desired seasonings (I love to use Trader Joe's 21 Seasoning Salute)
5. Remove from heat and blend with either immersion blender or in batches in a regular blender.
6. Top with fresh herbs, grated parm, crouton, whatever you desire and enjoy!
Keep in the fridge for a few days or freeze.
Confession. The first time that I made this soup, I tried it with cauliflower. I wanted to achieve that creamy tomato soup texture but without the added cream. And if I can sneak in extra veggies, why not! While it was ok, and I ended up eating the whole batch (over time!) I wasn't impressed with it enough to share with you. I needed to find another way to make this soup creamy and delicious!


Vegan Vodka Sauce
Growing up Italian there was lots of pasta consumed with a variety of sauces too! One of my fav's has always been the infamous penne vodka sauce. Something about the creamy velvety texture soaked up in the little tubes of penne. I love when there are peas added to it too! Even better with a protein of chicken or shrimp to make it a hearty meal!

So when I received a pasta package from Tuscanini Foods containing a few different kinds of pasta and a tube of tomato paste I knew what I was making! Traditionally this sauce is made with heavy cream and lots of cheese. In trying to lighten this dish up I swapped the cream for full-fat coconut milk. I have been finding that coconut milk (the full-fat version from the can) is a great alternative for creamy dishes like this one. You get all the added benefits of coconut milk (healthy fats) and great for those who are non-dairy.

Trust me when I say that not all pasta is created equal! You can taste the authentic Italian quality in this pasta. We all agreed that it was delicious! And we were pleasantly surprised by how tasty the sauce was too! We didn't even miss the heavy cream (I secretly didn't tell my kids either at first! LOL!)
I added in chicken to our recipe for some added protein. Shrimp, tofu or even just hemp seeds are all great protein options as well.

This dish is great for a special occasion like Valentines Day or around the holidays when you need a meal to feed a large crowd that looks and tastes impressive! Very few ingredients and simple to put together! All you need for this sauce is;
1 tube of tomato paste (mine was from Tuscanini)
1/4 cup vodka
1 14oz can full-fat coconut milk
2-3 garlic cloves, chopped
1/4 cup olive oil
Salt & Pepper to taste (red pepper flakes for some heat if desired)
Saute the garlic in olive oil, add in the tomato paste, stir to loosen up a bit then add in the coconut milk, mix well and let simmer for a few minutes. Add in seasonings and then pour over cooked pasta. You can also make a batch of this sauce and freeze it for later consumption.
Ingredients:
1 tube of tomato paste
1/4 cup vodka
1 14 oz can full-fat coconut milk
1/4 cup olive oil
2-3 garlic cloves
Salt & Pepper to taste (chili flakes, parsley, basil etc.. if desired)
Instructions:
1. Heat olive oil over medium heat. Add the garlic, be sure not to burn. Only cook for a few minutes.
2. Add tomato paste until loosened up a bit.
3. Add in Vodka and let it simmer out. Then add in coconut milk, salt & pepper and blend well together and let simmer for a few minutes.
4. Once pasta is cooked, add sauce and enjoy. Season more as desired.
Slow Cooker Lentil Tacos
Lately, my husband and I have been craving tacos! However, we are picky with where we eat as we have high expectations with food LOL! For me, there is nothing like a good homemade taco. I have my own taco seasoning that I blend together too so no funny stuff in there! Instead of the usual go-to of chicken, I wanted to give lentil tacos a try - wrapped in collard greens no less! I'm ambitious what can I say!

I should start with that for 21 days this January I decided to go on a bit of a detox from wine, sugar and refined carbs. So taco night meant no actual taco. I have always wanted to try collard green wraps, but that big fan like leaf intimated me!
Will it actually roll?
Will it taste bitter?
Will my food breakthrough?
So many questions when all I want is a taco! So what does one do when they don't know how to do - YouTube! Yup, found the secret to rolling a good collard wrap and it's all about the steam. You can steam them or for me, I just popped them in the microwave for a few seconds. (keeping it simple!) But before that, you should trim off and back the large stem in the middle as well.

Look how cute! They rolled so easy, I was surprised! And no bitter taste. Did they fall apart some, yea but honestly not any different than using a soft taco. I think I need to perfect my taco rolling skills a bit more.....
On to the lentils! I made these in the slow cooker so when I came home from work they were ready to go! A tip I have learned with lentils is to rinse them before cooking. This way you can pick out any 'stones' that you find, it reduces the cooking time (I guess this would come in handy when NOT using the slow cooker) and it helps with digestion. With me, they tend to make me bloated and gassy (just being honest!) I definitely noticed a difference with this recipe.
(Some lentils you will need to soak overnight, I purchased the Wegmans brand and no soaking was necessary.)

In true Cherise fashion, the recipe is simple and ingredients minimal. All you will need is;
1.5 cups red lentils (really any color will do)
chopped onion and garlic
vegetable broth
coconut aminos (soy sauce alternative)
apple cider vinegar
spices such as cumin, oregano, paprika, hot pepper flakes, S&P
salsa
collard greens (or other wraps you like)
Pour everything into the slow cooker, go about your day and come back to your Lentil Taco Tuesday! (or any lentil taco day really!)
Feel free to add any toppings you choose such as guacamole, sour cream, shredded cheese, additional salsa....
This makes a big batch so great for leftovers or meal prep.
Be sure to let me know on Instagram or Facebook if you give them a try. If you like this recipe and would like more be sure to subscribe back on my homepage!
Ingredients:
1.5 cups lentils, rinsed through and soaked if necessary (check package)
1/2 cup chopped onion
1 tbsp minced garlic
32 ounces vegetable broth
1 tbsp apple cider vinegar
1 tbsp coconut aminos
3 tsp ground cumin
1 tsp paprika
1 tsp oregano
sprinkle salt and pepper (more for taste)
1 cup salsa
1 bunch collard greens (if using)
Instructions:
1. Combine all ingredients to the slow cooker. Mix well together.
2. Cook on low 3-4 hours or high 6-7. Mix in between if possible (not necessary)
3. Adjust seasonings and enjoy!
Pasta Fagioli Soup
I know you must be thinking....another soup recipe!? But soups are so easy and can be made healthy enough where you get your veggies and protein in without much work. So yes, another soup recipe from me! LOL!

Plus it makes for large batches so you can enjoy it all week (great for meal prep) or freeze for another time to enjoy. And I encourage making your own soup vs. buying (when you can) this way you control your destiny of ingredients including the sodium. I always opt for low sodium broths - I prefer to add in my own sea salt to my taste.
Now onto this childhood fav of mine! This was my go-to soup growing up from the local Italian Pizzeria by me. It was just so tasty, warm and comforting. Along with a big ol' piece of crusty Italian bread too! I remember the saltiness of the pancetta and creaminess of the beans. I knew it was time to make my own batch!

I get excited and surprised as to how easy this went together. Just a few ingredients are needed all in 1 large pot (yea!) and within 30 minutes you have a meal! And most of those 30 minutes is the soup just cooking on its own. A shortcut that I always use is buying frozen mirepoix. I say this with all my soup recipes. Why cause more work for myself if I don't have to? I know most chefs frown upon the frozen way for carrots, celery, and onions but it works just great for me!
Other ingredients needed are;
crushed tomatoes
1 can cannellini beans
vegetable or chicken stock (low sodium/organic if possible)
garlic
fresh parsley & basil
salt & pepper
freshly grated parm (optional but so worth it!)
olive oil
Start with sauteing the oil and mirepoix for a few minutes, add in the garlic and simmer for a few minutes more. Next pour in tomatoes, broth, and beans along with the seasonings. Let simmer for about 20 minutes. Viola! Soup is done! Option to add in small pasta. Just cook the pasta separately and then add it in before consuming. I like to use red lentil pasta - fewer carbs and so yummy!

Store in the fridge for a few days to enjoy (meal prep!) or freeze. (not with the pasta though) I hope you enjoy this childhood fav as much as I do! Be sure to share with me on Instagram or Facebook when you make yourself a batch of this warm and comforting soup!
Ingredients:
1 frozen bag mirepoix mix
1 can cannellini beans (rinsed)
1 26.4oz box of crushed tomatoes (I love Pomi)
1 32oz low sodium vegetable or chicken broth
2 tbsp olive oil
3 garlic cloves chopped
handful fresh parsley & basil, chopped
1/4 cup fresh grated parm cheese
salt & pepper to taste
Instructions:
1. In a medium pot heat oil over medium heat.
2. Add in mirepoix and saute until softened.
3. Add garlic and saute a few minutes.
3. Add in broth, tomatoes, and beans.
4. Mix well. Add in salt & pepper then parsley & basil.
5. Let simmer about 20 minutes
Creamy Vegan Butternut Squash Soup
Still rocking soup season as Jersey continues to get cold! I am a big fan of butternut squash - roasted as a side dish, stuffed as spaghetti squash, stews and now a creamy vegan soup!

The game changer was purchasing my immersion blender. I have always wanted to make creamy soups but the thought of transferring the ingredients hot and steamy to a blender in batches goes against my simple recipe philosophy!
Once I saw how easy it was to now make creamy soups with just a hand blender, my life has changed! I love creamy soups in the Winter but often find store-bought brands with dairy, sugar, high in sodium and other ingredients that I just don't care for.

I adopted this recipe from one of my fav bloggers WellPlated. I love that she uses coconut milk to make it extra creamy while keeping it dairy free. I went with my leftover chicken bone broth from Bonafide Provisions but you can use vegetable broth too to keep it vegan/vegetarian.
The addition of the fresh herbs I think are key to this recipe. I went with fresh sage and rosemary, the aromatics alone are worth it! (You can heat up the leftover herbs on the stove with a cinnamon stick and orange peels to make your home smell festive!) Toasted pumpkin seeds top everything off and give it a slight crunch. In place of any added sugars, there are apples chopped up in this dish - one sweet and one tart which are genius! I went with a granny smith green apple and a honey crisp (which is my fav!!)

To make this recipe even easier I purchased butternut squash already diced and ready to go. Cut's your prep time down! Chop up a sweet onion and add it to the slow cooker along with the cubed butternut squash and cored and diced apples. Pour in your stock of choice (go with organic and low sodium) season with salt, pepper, nutmeg, cinnamon, and turmeric. Cook on high for 3-4 hours (I went with the full 4) Add in the coconut milk at the end and again on top before serving if you wish! Sprinkle with the fresh herbs and toasted pumpkin seeds.
Enjoy all week long as this can be stored in the fridge for a few days and even frozen for later enjoyment. Creamy and delicious and love that it came out thick! Perfect for a snack or great with a salad. Even better as an appetizer on Thanksgiving!
Be sure to tag me on Instagram if you give it a try! I love to see what you are up to!
Ingredients:
1 large package cubed butternut squash
1 yellow onion, chopped
1 granny smith apple
1 Honeycrisp apple (both apples cored and chopped)
2 cups low sodium chicken/vegetable broth
1 tsp salt
1/2 tsp black pepper
1/2 tsp nutmeg
1/2 tsp cinnamon
1/2 tsp turmeric
1 cup light coconut milk
Chopped fresh sage and rosemary
Toasted pumpkin seeds (optional)
Instructions:
1. Spray bottom of a slow cooker.
2. Add in chopped onion, butternut squash, apples, broth and seasonings (saving fresh herbs till the end)
3. Cook on high for 3-4 hours
4. Add on coconut milk
5. Puree with an immersion blender until smooth (option to blend in batches in a blender)
6. Sprinkle with fresh herbs and toasted pumpkin seeds
Sweet & Savory Eggplant Stew
Well, it's Winter here in Jersey, early as usual! This is when I like to make big batches of soups and stews. All the goodies in one pot, let simmer and enjoy all week or freeze and enjoy later on.
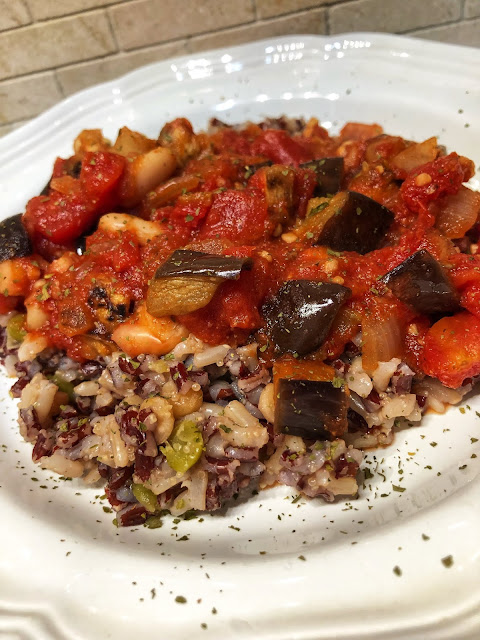
This meal is easy to customize to your liking. I used eggplant, cannellini beans, crushed tomatoes and a variety of spices ranging from sweet (maple syrup) to savory (red curry paste, smoked paprika, and cumin) It is the perfect blend and they all compliment one another to leave your palette satisfied!

To start, you cut up a medium-sized eggplant and roast in the oven with good quality olive oil and salt until softened. While that is cooking, saute the onions and garlic in a large stock pot, add in the crushed tomatoes, beans, and the spices and let simmer so everything blends together well. Once the eggplant is done add it to the pot and simmer for a little while longer. The aroma alone is AH-mazing! You can go for chicken instead of beans or use both!

Of course, my kids wanted nothing to do with it LOL! My son is getting pickier in his pre-adolescent age and my daughter, well she never wants to try it! That's Ok because then more for me and the hubs to share plus I was able to freeze a good portion for another time.
I went with a mixed rice blend from Wegmans but you can certainly go with cauliflower rice or a pasta of your choice. Pass around some hot buttered rolls and you have yourself a warm comforting meal to make the Winter seem a little more tolerable!
If you like eggplant like me check out my other recipes like Healthy Eggplant Caponata, Vegan Eggplant Meatballs, or Eggplant Bolognese.
Be sure to share with me on Instagram if you try this out or tweak it to your taste - love to see what you are cooking up!
Ingredients:
1 Eggplant, diced
1 onion, diced
1 tbsp minced garlic
1 28 oz can chopped tomatoes (I like this one)
1 cup cannelloni beans
1 tbsp smoked paprika
1 tbsp cumin
Sea Salt to taste
1 tbsp maple syrup
1 tbsp red curry paste2 tbsp olive oil (divided)
Instructions:
1. Heat oven to 425F. Place diced eggplant on a spray lined baking sheet. Mix with 1 tbsp olive oil and sprinkle with sea salt. Bake for 30 minutes or until soft.
2. While eggplant is cooking heat up remaining 1 tbsp oil in a large pot and add in onions to saute for a few minutes. Then add in garlic, paprika, and cumin and cook a few minutes more.
3. Add crushed tomatoes, cover and let cook for a few minutes more. If too think you can add some water.
4. Remove cover and add in beans, maple syrup, and red curry paste. Simmer a few minutes. Then add in eggplant. Simmer additional 10 minutes.
5. Adjust seasonings as necessary.
6. Serve over rice, cauliflower rice, pasta or as it.
7. Can store in the fridge for a few days or freeze.


Butternut Squash Quinoa Bowl
It is almost Fall here in Jersey and just like the store's everything starts to roll out early including produce! Although you can find butternut squash pretty much year round, now is the time it really makes a presence and the recipes start to roll in...like this one!


Butternut squash is apart of the gourd family (think pumpkin, melon, cucumber) and has seeds so yes, it is technically a fruit. Low in fat, a great source of fiber and Vitamin A (hence its orangey color) is another reason why I add this 'fruit' to my Fall fav list.


Goes great as a meal or a tasty side dish. I have been enjoying it both ways this past week. I had it over greens for a salad and then on the side with my turkey burger. All you need for this bowl is;
Butternut Squash (I purchase mine pre-cut)
Quinoa
Red Onion
Dried Cherries
Pumpkin seeds
Plus the dressing that goes on it is so yum that I plan to make it again to use on other salad recipes. Made from simple ingredients that you probably have right in your pantry too!
EVOO
Honey or Maple Syrup
Honey Mustard (or dijon)
Apple Cider Vinegar
All the tastes of Fall if you ask me! Plus this is a great option for meal prep as it can be stored in the fridge for a few days. Just keep the dressing separate until ready to eat. Get creative with your add in's too! Different dried fruits, nuts or seeds.


Let me see your creations - love seeing what you all are up to! Let's connect on Instagram or Facebook!
Ingredients:
1 package cut up butternut squash (or 1 small whole one, roasted, seeded and cut into bite-size chunks)
3/4 cup uncooked quinoa
1/2 small red onion, diced
1/2 cup dried cherries
1/2 cup pumpkin seeds
Salt & Pepper to taste
Dressing:
3 tbsp EVOO
1.5 tbsp apple cider vinegar
1 tbsp honey mustard
1 tsp honey
salt & pepper to taste
Instructions:
1. Preheat oven to 400f. Spray a lined baking sheet with oil and add chopped butternut squash. Cook for 30 minutes turning halfway through. Pierce with a fork to check for doneness.
2. Cook quinoa according to package directions while squash is cooking. (quinoa can be made ahead of time too)
3. In a small jar or bowl mix the dressing ingredients together - taste and adjust seasonings.
4. Once squash is done, scrape into large bowl. Add the cooked quinoa, onions, pumpkin seeds, dried cherries, and salt and pepper.
5. Drizzle dressing over the entire bowl if enjoying right away. Otherwise, store separately and add dressing before enjoying.
6. Can be stored in the fridge for a few days.
Air Fryer Eggplant Stacks
Do you take advantage of Prime Day deals? I usually don't as I feel I would end up buying things that I really don't need but want, know what I mean?! LOL!
But this year I knew that I wanted an air fryer. My kids are kids and they still love breaded chicken in any form. While I have created healthier ways to make them they are still cooked in oil (a lot of oil) and so time-consuming to make!
Plus I do enjoy a chicken cutlet here and there! So I was on the hunt for an air fryer and I ended up with this one - Super Deal XXL Air Fryer! Mainly because it was one of the cheaper ones - I got it for $50! I mean an air fryer is an air fryer, right?!

The first food that I 'air fried' were zucchini fries and they were delish! So crispy and love the non-oily taste too! Just look at that crispiness! Then I tried chicken tenders that I made with almond meal and those came out so crispy too! This thing amazes me I tell ya! Everything comes out crispy with no oil!! Plus, everything cooked within 15 minutes! Score! Up next then, Eggplant cutlets!

For this recipe, all you need is 1 medium eggplant sliced into 1 in rounds, good sauce, breadcrumbs of choice (you can go GF, almond meal or I ended up blending a few slices of Dave's Killer Bread that I had), fresh mozzarella (you will thank me for this), beefsteak tomato, balsamic glaze and fresh basil & parsley. That's really it!
The most labor-intensive part is prepping the eggplant which consists of slicing the eggplant, laying them out and sprinkle with salt (to get the bitterness out), then breading them. Other than that they cook up super fast in the air fryer and then you just put together the stacks.

I start with sauce at the bottom of the pan, then I layer one slice of eggplant, tomato, mozzarella, a spoonful of sauce, and a piece of fresh basil and then top with another eggplant slice and spoon sauce on the top again. Just repeat until all slices are used up. Then I drizzled the glaze evenly over the top and sprinkled with fresh parsley and basil.
Feel free to grate fresh parm cheese over the top or nutritional yeast (a dairy free option - but if you already have the mozzarella in there then....) Bake for about 15 minutes until everything is heated through and the cheese is melted.
That's it! If you don't have an air fryer then you can bake the slices before stacking them - they just may not come out as crispy but it will still work!
These are great for leftovers too! I paired mine with zucchini noodles but you can pair these with anything! Salad, veggies, pasta..... for a complete meal!
Don't forget to tag me on Instagram or connect with me in my private FB group My Fit Life Tribe to show me your air fryer meal! Would love to hear what you make in your air fryer!!
Ingredients:
1 medium eggplant cut into 1" rounds
Several slices of fresh mozzarella (I just bought the fresh ball and sliced from there)
1 large beefsteak tomato
1 jar quality low sodium sauce (or homemade)
Balsamic glaze (to drizzle)
Salt to sprinkle on eggplant rounds to 'sweat'
Fresh parsley and basil
2 eggs
2 cups bread crumbs (seasoned with Italian seasonings)
Instructions:
1. Place eggplant rounds on a lined baking sheet. Sprinkle salt on one side and let 'sweat' for a few minutes (once you see water forming dab it away with a paper towel) Repeat other side.
2. Whisk the eggs in one bowl and place the breadcrumbs in another. Make a workstation to dip the eggplant in the egg wash first, drip off any excess, then coat in breadcrumbs. Place coated eggplant slices on another baking sheet or towel.
3. Turn on the air fryer and place eggplant slices in batches to cook. Mine took 10 minutes each.
4. While these are air frying preheat oven to 375f.
5. Coat bottom of a large rimmed baking dish with 1 cup of sauce. Start to layer first layer of air fried eggplant slices.
6. Top each with a tomato slice, mozzarella slice, a spoonful of sauce, basil leave, then top with other air fried eggplant half (make sure to keep the sizes similar). Add another spoonful of sauce on top of each stack. Drizzle all of the stacks with the glaze and sprinkle with fresh parsley & basil.
7. Put in oven for 15-20 minutes to warm through and the cheese melted.
8. Let cool and enjoy!
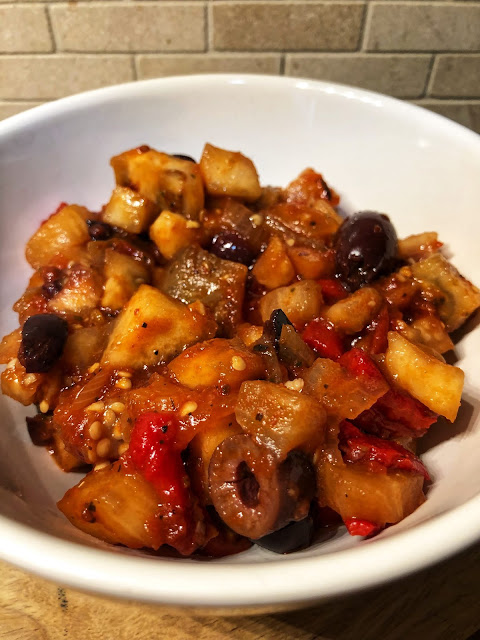
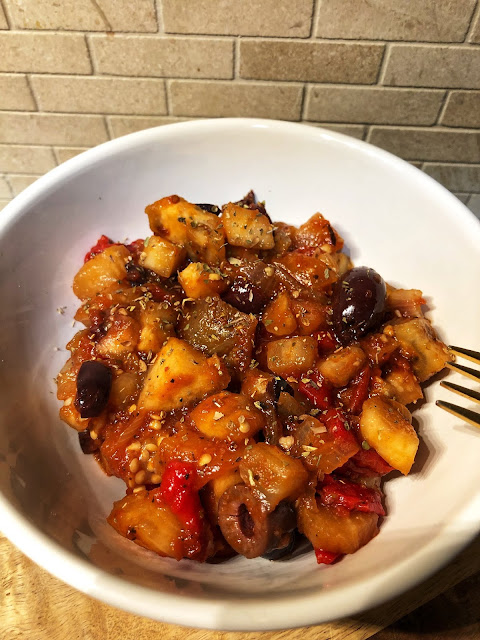
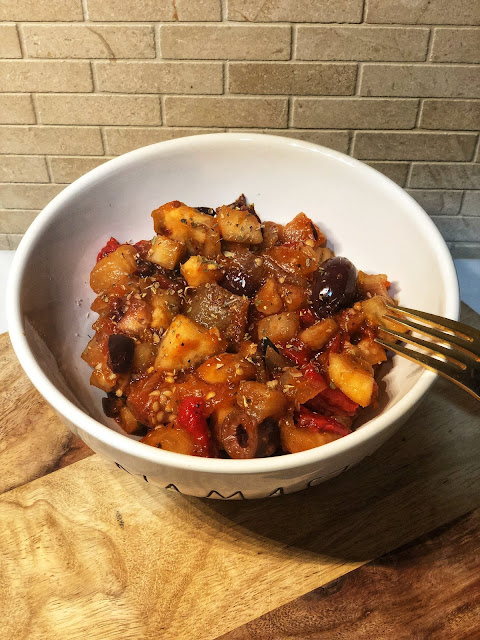
Healthy Eggplant Caponata
With Eggplants in full bloom right now I am loving the many different recipes that can be made with this versatile veggie/fruit. Since it has seeds and comes from a flowering plant it is technically a fruit - who knew?!
Did you know that eggplants are a nutrient dense food meaning it has lots of good stuff in there for ya! It has magnesium, vitamin K, C potassium, and lots of antioxidants. With them high in fiber and low in calories, they are helpful with weight loss too! Score!!
I have seen other recipes of caponata (which just means chopped eggplant with other veggies) with sugar added in but I promise there is no added sugar in this recipe. Just lots of veggies and good quality tomato sauce. Please be sure to buy a good quality tomato sauce - there are a few good jarred ones but be mindful of the sodium. I like using Pomi crushed tomatoes as it only has 5 grams of sodium!
I had a nice large eggplant from the farmers market that I peeled (optional to leave on the skin) chopped into bite-size pieces and sprinkled with salt in a large bowl to sweat them out (it takes the bitter taste out as well) While they are chilling in the bowl I saute up the onions and garlic in a little olive oil. Then I add in the eggplant and sauteed everything a few minutes more.
Next comes in the black olives and roasted peppers along with the crushed tomatoes. I let them marinate all together for a few minutes to blend the tastes together. Then I add in pepper, oregano and 21 seasoning salute from TJ.
Simmer everything together for a few minutes until softened and sauce thickens a bit. Give it a taste and adjust the seasonings as needed. This is great in a bowl on its own, over crusty bread as an appetizer or as a meal with cauliflower rice or quinoa on the side. Oh even over chicken, fish or seriously cold out of the fridge! LOL!
I like to sprinkle hemp seeds over it for a little plant protein power. I sprinkle these on mainly everything! They are also a great source of omega 3's. You could also go for freshly grated parm cheese or nutritional yeast to keep it dairy free. Depending on how big your eggplant is you could come out with a large batch - great for leftovers or possibly to freeze (although I have not tried that yet)
Remember to tag me on Instagram or comment if you give it a try! I always like to see what you are up to in your own kitchen!
Ingredients:
1 medium eggplant (peeled and diced)
1 small onion (diced small)
2 cloves garlic, diced
1 roasted red pepper, chopped
1/4 cup black olives, chopped
1-2 cups of crushed tomatoes (depending on how big your eggplant is)
1 Tbs olive oil
1 Tps oregano
1/2 tsp pepper
1 Tbs 21 seasoning salute (or other Italian seasonings)
Sprinkle of salt
Instructions:
1. Add chopped eggplant to a large bowl, sprinkle with salt and let sit for a few minutes.
2. Heat oil in the pan, then add in onions and cook until softened, add garlic.
3. Add in eggplant and let simmer until softened.
4. Add in chopped red pepper, olives and sauce. Let simmer with lid for several minutes and let the flavors blend together.
5. Add in seasonings and mix well. Adjust as needed.
Enjoy!


Vegan Crab Cakes
When my husband and I were dating and would go out for dinner we almost always ordered the crab cakes to split as an appetizer. I mean who doesn't love a good crab cake?!

Then we decided to get health conscious as we got older (don't we all?! LOL) and came to realize that they are not the healthiest items on the menu. Granted, it depends on how they are made but even then it depends on the type of crab that is used. I know, so much to think about when all you want is to enjoy a damn crab cake!
Well, when the juice place in town (that I ever so frequent at!) had a vegan crab cake on the menu one day I was intrigued! I knew it would not have crab in it but I really had no idea what it would consist of. When I found out that the main ingredient was artichokes I was like what?! I love artichokes! Who knew they could replace a crab cake and taste so yummy?!

This is often how my recipe creations come about...I am a foodie and eat around at local places often and then inspiration strikes because why not recreate at home?!
After a few searches and test runs, I found what recipe works best to my liking. There are options to add fish sauce, seaweed wraps, etc to bring that 'crab' taste into it but I don't care for that (great if you do - please feel free to add!) Plus I like to go with what ingredients I have on hand already!
All that is needed is;
chickpeas
artichokes
onion
garlic
coconut aminos
apple cider vinegar
lemon juice
mustard
fresh dill & parsley (from my garden!)
panko breadcrumbs
salt & pepper to taste
Mashed all together to form what looks like crab cake meat! I did saute the onions and garlic first, then added in the chickpeas and mashed them but left them chunky to create that crab cake-like consistency. Chopped up the artichokes and added everything together in 1 bowl and mixed well.
I used my egg ring and formed 6 patties. I first went with adding coconut oil to my frying pan to get them a golden brown but they are too fragile to flip so in the oven they went at 350 degrees for about 15 minutes. I finished them off with a quick broil to brown them a bit and it was perfecto! They came out so yummy and delicious!
Now with crab cakes, you traditionally have a tartar sauce but I decided to go with a roasted red pepper sauce made with plain greek yogurt. Just a few simple ingredients and you have a tasty sauce to top it off with! (recipe below)

I put everything over black rice mixed with cauliflower rice and peas. Yum! You could always opt to have them over greens as well and use the roasted red pepper sauce as a dressing too! The possibilities are endless! You can keep leftovers in the fridge for a few days and reheat in a pan with a little oil (careful when flipping!) or possibly freeze but I have not tried this yet.

You may not have any leftovers though! Either way enjoy and be sure to tag me on Instagram to share your creation!
xo, cherise
Ingredients:
1 can chickpeas (drained)
1 can artichokes (chopped)
1/2 cup red onion diced
2 cloves garlic, chopped
2 tsp olive oil (divided)
1 cup panko breadcrumbs
1 tsp dijon or honey mustard
1 tsp apple cider vinegar
1 tsp coconut aminos
1.5 tsp lemon juice
Fresh parsley & dill (a handful of each - to your liking)
Salt & Pepper to taste
Instructions: Preheat oven to 350f
1. Add 1 tsp olive oil to the pan on medium heat. Add onions and saute for a few minutes then add garlic (be sure not to brown)
2. Add chickpeas to a bowl and mash with the back of a fork - leave some clumps for texture.
3. Add in onion and garlic mixture along with rest of ingredients and mix well to combine.
4. Form into either 4 large patties or 8 small.
5. Pan fry until golden brown on the outside. Option to heat in the oven for a few minutes to warm through.
6. Server over greens, side black rice, and top with roasted red pepper sauce.
Ingredients:
1 (7 oz) jar roasted red peppers drained (reserve 1 tsp oil from the jar)
1 cup plain greek yogurt
1 tbsp lemon juice
2-3 garlic cloves
Salt & Pepper to taste
Red pepper flakes (optional)
Instructions:
1. Blend all ingredients together until combined well. Taste and adjust seasonings as needed.
2. Use leftovers as dressing or freeze in cubes for later use.


Farm Fresh Veggie Bake
I call this Farm Fresh as it is Summer here in Jersey and the veggies are in abundance at the farms. We are called the Garden State! I have a local farm in the town called Dreyer's Farm that has been family owned since the early 1900's! The veggies are fresh and vibrant and I can't resist grabbing a bunch and cooking with them!

You could technically make this dish with other veggies you like but I went with eggplant, zucchini & cherry tomatoes since those are what I saw jumping out at me at the farm! They were so beautifully placed and the colors were so vibrant! They say you eat with your eyes and my eyes were delighted by these veggies and I knew right away these were the ones to go with!
You could grab all the ingredients needed for this recipe right there too besides the veggies. Fresh parsley and basil, garlic cloves and fresh parm cheese round out this yummy veggie bake. You could have this for a tasty side dish to any protein you choose or it works well on its own too.

Once you chop all the veggies into bite size pieces, drizzle some good quality olive oil over the top, add the fresh garlic cloves, salt, pepper, and freshly grated parm cheese. Toss it well to combine and transfer to an oven-safe casserole dish. After it is all done baking, top with fresh basil & parsley and even add more fresh grated parm to top it off with that salty flavor. Yummo!

I love how the cherry tomatoes cook down and make their own sauce to give this dish a juicy taste. Lots of flavors going on here - definitely not a boring veggie dish! Once my little patio garden blooms I will be able to use my own veggies for this recipe next time!
If you give it a try don't forget to comment below and tag me on Instagram! I love to see what you are cooking in your kitchen!
Farm Fresh Veggie Bake
Recipe Here
Ingredients:
3 medium zucchini
1 small eggplant
1-pint cherry tomatoes
4 garlic cloves
1 tbsp quality olive oil
1/3 cup fresh grated parm cheese (plus for topping if desired)
Salt & Pepper to taste
Fresh chopped parsley & basil
Instructions:
1. Preheat oven to 375F and lightly grease a 3-quart casserole dish (or similar)
2. Peel zucchini (you can leave the skin on if desired) cut into bite-size pieces. I slice in half then half again and cut into half moons. Same with the eggplant - optional to peel. Then slice the cherry tomatoes in half. Add all veggies to a large bowl.
3. Drizzle with olive oil, salt & pepper to taste, garlic, parm cheese and sprinkle half of the fresh herbs.
4. Transfer to baking dish and bake for about 30 minutes. If you want them a bit more tender you can cover with tinfoil and bake 10 minutes more so not to burn.
5. After baked through, sprinkle with more fresh parm cheese and top with the remaining fresh herbs.
6. Serve warm and enjoy with a side of lean protein or on its own!
Zucchini Pizza Boats
Summer is approaching which means zucchini season is here! On our little patio garden, I always grow zucchini. They are super simple and usually, you get a lot! Let's go over why zucchini is so great for you too! Low in calories and carbs. High antioxidants and vitamin C. Goof source of potassium and vitamin B. Plus maintains good eye health! - Who knew?!

I love to cook with what is in the season when possible - especially in the Summer as that is when you can find many farmers markets and my local farm in town is open! We do grow basil and parsley, tomatoes, cucumbers, and this year we are trying for purple cauliflower, squash, and broccoli! However, it is still May so nothing in my garden is growing yet - so off to the farm I go!

I was craving pizza, (which is common LOL!) and once I saw the tomatoes, basil and fresh mozzarella it was a sign! I thought of my fajita stuffed zucchini boats and knew that I could recreate the same with my pizza boats! Easy enough to just scrape out the insides a bit, add sauce, fresh mozzarella, sliced cherry tomatoes and sprinkle with fresh basil at the end - voila! Pizza craving answered (sort of!)

You could even grill these- those nice grill marks make for a tasty Summer meal. You could get creative and add additional toppings such as nitrate-free pepperoni, mushrooms or other veggies. Top it off with spices such as salt and pepper, garlic salt or red pepper flakes.
Take advantage of your summer veggies and make these zucchini boats for a quick weeknight dinner for your next cookout! Definitely a crowd pleaser!
Don't forget to comment or tag me on Instagram if you give them a try! It makes me smile!
Ingredients:
4 small fresh zucchini
1 cup sauce
Fresh Mozzarella (sliced from a fresh ball)
1/2 cup cherry tomatoes (sliced)
Fresh basil
Salt & Pepper to taste
olive oil - optional
Instructions:
1. Preheat oven to 400f
2. Slice zucchinis long way. Scoop out seeds gently. Pat the insides to keep dry. Option to brush olive oil over the zucchini (inside and out)
3. Sprinkle with salt and pepper
4. Line a baking sheet and place zucchinis on the sheet.
4. Divide the sauce over the inside of the zucchini boats, top with mozzarella and sliced cherry tomatoes.
5. Bake for 10-15 minutes. Zucchini should be tender.
6. Remove from oven and sprinkle with seasonings and fresh basil.
3 Ingredient Quinoa Burger
In the Mazur house, Thursday nights are grill nights. This was born out of the fact that by Thursday this Momma was done cooking over the stove and wanted a break! Grilling is super easy and I know I can trust my husband to take over cooking for at least one night! LOL!

While my family indulges in grass-fed burgers (try to opt for grass-fed beef whenever you can) I am always on the hunt for a veggie burger. I do love Hilary's veggie burgers but when I can make my own I go for it! I have tried using sweet potato, eggplant, mushrooms & now quinoa which we all know is a great plant protein source.

In a large bowl, I added in the cooked quinoa, buttery cannellini beans, tomato paste, chopped sun-dried tomatoes and seasonings such as fresh basil, parsley, salt & pepper. Mashed the beans well and mixed them in with the other ingredients. Then, I formed them into cute patties and let them sit in the fridge for about an hour to firm up. Yes, they will be soft and easily fall apart so treat them with care!

If you do grill them make sure the grates are super clean and well oiled. I went with these copper grilling mats to be safe - I didn't want to lose anyone to the BBQ pit below! LOL! By the way, these grill mats are awesome! Easy cleanup and you still get those grill marks!

Get creative with your toppings! I mashed up avocado to spread on the burger along with sliced tomato & fresh spinach leaves. I did go with a flat bun this time but you can go bunless, make it a pizza burger or have it over a salad too! These are freezer friendly and great for meal prep! I did have another for lunch the next day.
Be sure to share with me on Instagram if you give them a try! I love to see your creations!
Ingredients:
1 cup cooked and cooled quinoa
1 can cannellini beans, rinsed & drained
1/4 cup sundried tomatoes, chopped
1 tbsp tomato paste (optional)
Fresh basil & parsley, chopped
salt and pepper to taste
Instructions:
1. Preheat grill. Clean grates and oil well or use grill mats. (Option to cook in the oven at 375 for 15-20 minutes flipping halfway)
2. Place all ingredients in a large bowl. Mash beans well then combine all ingredients together.
3. Form into 4 patties
4. Cook on grill for 15 minutes, flip gently and cook another 10.
5. Serve with fav toppings (can be frozen)
Veggie Satay Bowls
When a recipe calls for peanut butter or any nut butter I am in! Yes, I am a self-proclaimed nut butter lover! I try all brands and flavors and incorporate them whenever I can into recipes. So when I came across satay sauces and saw that peanut butter was the star - I knew I had to recreate it!

Accompanied by red curry paste for some heat (as much or little as you like), coconut milk and chickpeas I knew this would be a taste bud winner! You could make this satay sauce and use it over numerous dishes. Chicken, fish, beef noodles....
I went with the ever popular zoodles to make it a veggie dish (shocker! lol!) In place of traditional soy sauce I like to use coconut aminos. It is a great alternative to soy sauce with less sodium.

Get creative with your veggie options. I went with red peppers, broccoli & mushrooms. Water chestnuts would have been a nice crunch in here! I also sprinkled hemp seeds over the veggies (great source of good fats and plant protein) & slivered almonds.
I kept the extra sauce in a mason jar in the fridge and dipped raw veggies into it throughout the week! Yum! Also great for meal prep as you can store the sauce and just add to veggies when ready to eat!

Don't forget to tag me on Instagram if you give it a try - it makes me smile! Also, comment and share with friends!
Ingredients:
Satay Sauce;
3 tbs coconut milk
1 can chickpeas (rinsed & drained)
1 tbsp coconut oil
1 tbsp red curry paste
1 tbsp creamy organic peanut butter
1 tsp mustard
1/4 tsp ground ginger
2 garlic cloves
salt & pepper to taste
lime juice to taste
Veggie Bowl;
2 zucchinis, spiralized, pressed with a paper towel to remove excess water
1 red bell pepper, chopped
2 cups broccoli
1 cup sliced mushrooms
1 tsp coconut aminos
2 tsp olive oil
toppings - slivered almonds, cilantro...
Instructions:
1. Preheat oven to 400
2. Add broccoli, red pepper, and mushrooms to a large bowl. Toss with 1 tsp olive oil, salt & pepper to taste.
3. Line baking sheet or spray and bake for 20 minutes until slightly cooked.
4. Combine all satay sauce ingredients in a food processor and blend well.
5. Heat oil in large skillet over medium heat, add zucchini zoodles and saute 2-3 minutes, tossing until they are soft but not mushy.
6. Add veggies to pan with zucchini and toss with coconut aminos.
7. Divide into bowls and top with satay sauce. Plus any toppings chosen.
Chickpea Spaghetti Veggie Dish
I love seeing all of the pasta alternatives these days from this once loving pasta girl! Now in place of flour, you have pulse pasta options made from chickpeas such as this one from Explore Cuisine that boasts 12 grams of plant protein & fiber! Definitely, a healthier option and it taste great too - bonus!

I went with the kale pesto I had on hand from Haven Row. I was introduced to this companies products when I attended a food event in NYC with one of my fav bloggers Rachl Mansfield! We made pizzas with their sauces which range from kale pesto, cauliflower alfredo, butternut squash and beet lemon! So many options and recipes to be created with these!

Since it is chickpea pasta, it doesn't cook as long as regular pasta (otherwise it does get overcooked). After about 10 minutes I drain it then run it under cold water to stop the cooking process and this helps to keep it al dente.
While it is cooking, I sauteed up the tomatoes, spinach and I added in frozen peas. Then I added in the pasta, topped it with a few spoonfuls of the kale pesto and combined it well.

Safe to say that Nick liked it as he licked the bowl clean! I didn't even tell him it was chickpea pasta (sshhh...) Explore Cuisine has a variety of plant-based pasta's to choose from which opens the door for so many other recipes to create! I also received black bean spaghetti to try next! I encourage you to open your pallet and give these pasta's a try - your kids may never know the difference either!

Ingredients:
1 package fresh spinach
1-pint cherry tomatoes (halved)
1 cup frozen peas (optional)
1 tbs olive oil
1/2 tbs chopped garlic
1/4 cup chopped fresh basil
2 tbs pesto
Salt & pepper to taste
Instructions:
1. Cook spaghetti according to box directions (rinse under cold water when done to stop the cooking process)
2. While spaghetti is cooking heat olive oil in large skillet over medium heat. Add garlic.
3. Add cherry tomatoes, once softened add in spinach (I like to tear the leaves a little)
4. Toss in frozen peas and combine.
5. Add drained and cooled spaghetti and pesto. Mix well to combine.
6. Top with salt & pepper or any other seasoning that you like!
7. Licking the bowl is optional! Enjoy!
Zucchini Lasagna
Growing up Italian I loved my pasta (ok, let's be real I still do!) However, as we get, umm older our bodies may not take to pasta like it used to. I mean I was always a little chubbier growing up, and I am sure the pasta and bread had something to do with it (along with many other unhealthy habits) but when you are younger it can be easier to 'burn off' whereas now as I have just hit the big 4-0, not so much!

So on my quest to make over some of my beloved traditional Italian recipes here comes Zucchini Lasagna! I hope I didn't lose you yet, stick with me here as it is quite tasty!
Honestly, now that I have cut back on refined carbs I must say that I enjoy this version much more! I don't have that bloated rock in my stomach feeling that I usually get with regular pasta.
Now maybe regular pasta treats you just fine - lucky you! However, this is the healthier alternative as you are getting in a host of veggies with nutrients and your blood sugar will not spike and drop dramatically where you will feel the need to eat again shortly after.

I was able to stick with minimal ingredients (like I usually do) but this one is a small labor of love as you have to thinly slice the zucchini into lasagna like sheets. I just used my very sharp knife and it worked just fine. Diced eggplant with crushed tomatoes is the filling along with fresh ricotta cheese. You can opt to use a vegan option like my vegan ricotta cheese.
Start with layering the zucchini, spread the cheese and add the eggplant filling and then repeat. Top with a sprinkle of shredded mozzarella or here I used Miyokos vegan mozzarella cheese to melt on top.

I prepped this on Sunday and covered it in the fridge until later that evening and then baked it right before dinner. Takes about 40 minutes. Plus we had leftovers for the next night - so dinner for 2 nights! You can pair with a salad and voila! Kids tested by my son - bless his heart as he tries everything that I make - and he liked it! As always, no go with my teenage daughter, sigh....
Don't forget to share with me on Instagram when you make it! It truly makes my day!
Ingredients:
1 large eggplant, peeled and diced into bite-size cubes
2-3 large zucchini, ends removed, cut lengthwise into thin slices
2 cups no sugar added crushed tomatoes (I use this brand)
2 cups ricotta cheese (or vegan ricotta cheese)
2 tbs olive oil
Salt & Pepper to taste
Fresh herbs for seasoning (parsley, basil..)
Shredded mozzarella for topping (optional)
Instructions:
1. Preheat oven to 375f
2. Spray 8x8 pan liberally
3. Heat oil in large skillet then add diced eggplant and season with salt & pepper. Cook for 5 minutes stirring frequently until softened.
4. Add crushed tomatoes and heat through.
5. Layer zucchini to cover the bottom of the dish. (overlapping is ok)
6. Spread 1 cup of ricotta over zucchini and 1.5 cups of eggplant mixture
7. Top with the second layer of zucchini (running opposite direction of the first layer).
8. Spread remaining ricotta cheese and eggplant mixture (leaving about 1/2 cup for top layer)
9. Add the final layer of zucchini, top with remaining eggplant mixture and sprinkle with cheese (if desired)
10. Cook for 30-40 minutes until heated through.
11. Let it cool and set about 10 minutes before slicing.
Enjoy! xo-cherise
Mediterranean Spaghetti Squash
Have you tried spaghetti squash yet?! It literally can take the place of spaghetti with its string-like texture. I know avid spaghetti lovers will not agree (growing up Italian, I used to be one too) but trust me as I tell you it is a healthier option when that carb craving strikes!

Known as a Fall vegetable I have been finding these bad boys all year round! Some of the added benefits are low carb, wide range of vitamins and minerals, high fiber, low calorie and helps regulate blood sugar just to name a few! One squash was great for me and my husband for dinner plus I shared some with my son (still can't get my daughter to try new things...sigh...)
I will admit cutting this bad boy is not easy but I found that heating it up in the microwave helps the process. A minute in the microwave and slicing was easier (and safer!) as I cut the ends and sliced it down the middle. Rubbed it down with olive oil and salt and pepper, placed it upside down on a baking sheet and baked it for about 30-40 minutes until tender. If you can start to scrape spaghetti-like strands you know that you are good!

While the squash is cooking I prepared the Mediterranean filling. All the superstars are here with roasted red peppers, artichokes, olives, chickpeas, sun-dried tomatoes, and spinach. FYI I made a big batch of this filling so that I had leftovers for another dinner in the week- just added in cauliflower rice and dinner is set for another night. You're Welcome!! LOL!

Once the squash is done, stuff it with the filling and sprinkle fresh herbs and feta cheese or yeast. Heat it all up again to get warm and Voila! Dinner is done! So filling and tasty too! A definite staple in this household! Meal prep tip is to roast the squash on Sunday so during the week all you have to do is assemble and heat! As always, you can get creative with your fillings! Mix it up and add your fav's. That is the beauty of healthy cooking - it is so versatile!
Don't forget to comment and tag me on Instagram to share! I love seeing your creations!
xo-cherise
Ingredients:
1 large spaghetti squash
1 large roasted red pepper, chopped
2 cups fresh spinach, chopped
1/2 cup frozen artichokes, thawed and chopped
1/4 cup pitted and chopped kalamata olives
1 cup cooked chickpeas (I used canned and rinsed. The leftovers I seasoned and roasted up to keep as a snack)
1/4 cup sundried tomatoes
1 14 oz can no salt added chopped tomatoes
Fresh basil & parsley, chopped
Salt & pepper to taste
1 tsp olive oil
Feta or yeast (optional)
Instructions:
1. Preheat oven to 400f & line baking sheet with foil, sprayed.
2. Microwave squash for 1 minute for easier cutting.
3. Slice off ends and then slice in half. Scoop out seeds.
4. Rub inside/outside of squash with olive oil and sprinkle with salt and pepper.
5. Place cut side down on baking sheet and bake for 40 minutes until fork tender.
6. While cooking, prepare the remaining ingredients in a large bowl (except tomatoes)
7. Once squash is done and cooled to handle, spread chopped tomatoes into squash and top with filling.
8. Sprinkle with fresh herbs and additional salt & pepper, feta is desired. Put back in oven to heat through.
9. Enjoy! Save any leftovers of filling for dinner another night!
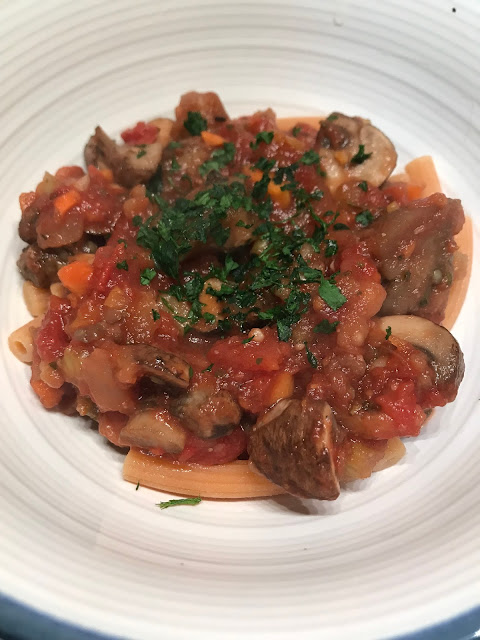
Eggplant Bolognese
(revised April 2018)
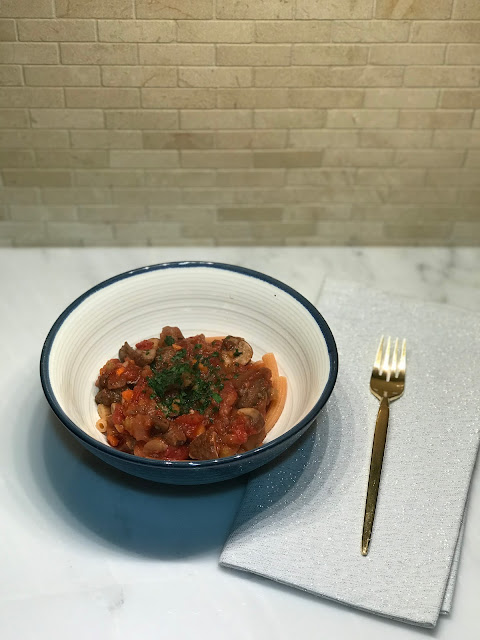
With colder months here in Jersey I think we all start to seek out warm comfort foods, right?! Bolognese has always been one of my favorite cold weather meals as it just warms me up from the inside out! Traditionally it is made with meat sauce or even turkey meat to lighten it up a bit. In the past, I have made it both ways and both ways taste delicious to me!
Adding in red wine really takes the taste up a notch too! I used a pinot noir that I was drinking and had some leftover so it worked out great! When it comes to using wine with any cooking I like to suggest that the wine you cook with is the same wine that you drink with as you will taste it throughout your meal.
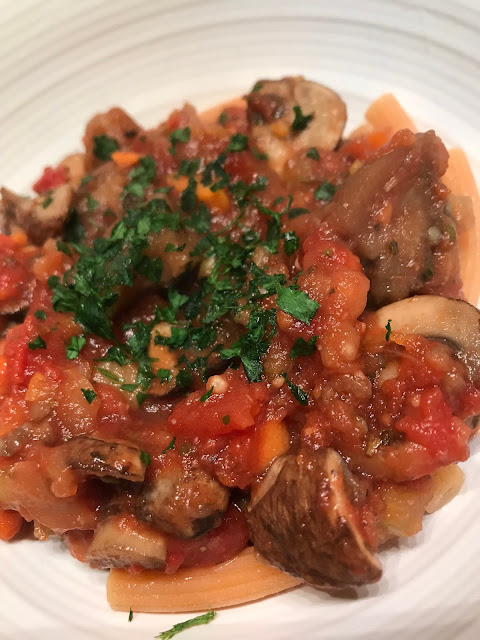
Now what to use as the base for this yumminess?! There are several possibilities out there from zoodles to keep it low carb, good old spaghetti or bucatini (a thicker noodle) or even ziti to grab all the chunks of meat sauce or in this case veggies! The ziti I used is made with red lentils from Explore Cuisine
As I have begun to eat more plant-based meals, this pasta is great as it has around 11 gram of plant protein per serving! Getting in protein is not as easy as it used to be for me so I am always looking for new plant proteins to incorporate into my meals.
Now while this bolognese skips on the meat it doesn't skimp on flavor with the eggplant, mushrooms oh and of course the pinot noir!
This recipe called for a big batch which I was pleasantly pleased with as it served as leftovers the next day and I even froze some for later (probably a quick lunch during the week!)
A nice piece of Italian bread would go great to soak up anything left in your bowl....I know, I know but that is extra unnecessary carbs but if you go with the zoodle option you can enjoy a small piece, right?!
Bonus - hubby and son both liked it! One day I will get my daughter to explore more foods (sigh!)
Ingredients:
1 medium eggplant
1 pound baby bella mushrooms (sliced)
1 medium onion-chopped*
2 carrots peeled and chopped*
2 celery stalks finely chopped*
2 tbs olive oil
1.5 cups drinkable red wine
2 garlic cloves chopped
1 (28oz) can crushed tomatoes (I like Pomi)
¼ cup tomato paste
8 oz pasta or zoodles
1 tsp basil
1 tsp parsley
1 tsp oregano
Seal salt to taste
Optional - fresh grated parm or nutritional yeast
*I like to buy a mirepoix mix so all the work is done already!
Instructions:
-
Bake the whole eggplant in the oven at 350F for 1 - 1.5 hours until very tender. Let eggplant cool while preparing the rest.
-
Saute mushrooms in large pan over medium-high heat until they have shrunk by half - maybe 8-10 minutes. Set aside.
-
Heat the oil in a large pot over medium heat until hot. Add in onion, carrot and celery mixture and season with salt to taste (¼ tsp should do). Cook and stir frequently until softened.
-
Add garlic, seasonings and tomato paste - cook, until thickened up.
-
Once the eggplant is cool, peel and chop small then add to pot along with mushrooms and crushed tomatoes, wine and salt to taste.
-
Simmer over low heat with cover for about an hour until sauce thickens. Stir frequently.
-
While sauce is cooking, bring a large pot of salted water to a boil for pasta (unless using zoodles)
-
Once pasta is cooked, drain and add pasta to the pot of sauce and cook for a few minutes. You can reserve some of the pasta water to add if the sauce is too thick.
-
Sprinkle the remaining herbs over and parm cheese if desired.
-
Can be stored in the fridge for 3-5 days or frozen for up to 6 months
-
Enjoy!

Adding in red wine really takes the taste up a notch too! I used a pinot noir that I was drinking and had some leftover so it worked out great! When it comes to using wine with any cooking I like to suggest that the wine you cook with is the same wine that you drink with as you will taste it throughout your meal.

Now what to use as the base for this yumminess?! There are several possibilities out there from zoodles to keep it low carb, good old spaghetti or bucatini (a thicker noodle) or even ziti to grab all the chunks of meat sauce or in this case veggies! The ziti I used is made with red lentils from Explore Cuisine
Now while this bolognese skips on the meat it doesn't skimp on flavor with the eggplant, mushrooms oh and of course the pinot noir!

This recipe called for a big batch which I was pleasantly pleased with as it served as leftovers the next day and I even froze some for later (probably a quick lunch during the week!)
A nice piece of Italian bread would go great to soak up anything left in your bowl....I know, I know but that is extra unnecessary carbs but if you go with the zoodle option you can enjoy a small piece, right?!
Bake the whole eggplant in the oven at 350F for 1 - 1.5 hours until very tender. Let eggplant cool while preparing the rest.
Saute mushrooms in large pan over medium-high heat until they have shrunk by half - maybe 8-10 minutes. Set aside.
Heat the oil in a large pot over medium heat until hot. Add in onion, carrot and celery mixture and season with salt to taste (¼ tsp should do). Cook and stir frequently until softened.
Add garlic, seasonings and tomato paste - cook, until thickened up.
Once the eggplant is cool, peel and chop small then add to pot along with mushrooms and crushed tomatoes, wine and salt to taste.
Simmer over low heat with cover for about an hour until sauce thickens. Stir frequently.
While sauce is cooking, bring a large pot of salted water to a boil for pasta (unless using zoodles)
Once pasta is cooked, drain and add pasta to the pot of sauce and cook for a few minutes. You can reserve some of the pasta water to add if the sauce is too thick.
Sprinkle the remaining herbs over and parm cheese if desired.
Can be stored in the fridge for 3-5 days or frozen for up to 6 months
Enjoy!
Vegan Eggplant Meatballs
Meatless Monday's just got a whole lot better! Before I moved into a plant-based lifestyle my one go to vice was meatballs! My family and I liked to call ourselves meatball connoisseur's as we always tried them if they were on the menu! Plus growing up Italian I have had my share of meatballs and often made them homemade.

While my family still enjoys their meatballs I have opted to make my own eggplant version. Eggplant is considered a fruit and is loaded with vitamins and nutrients such as vitamin C, K, B6, magnesium & copper to name a few. Plus they are a great source of antioxidants which help fight cancer cell growth. Eggplants are so versatile and can be used in a variety of ways from lasagna, stacks, burgers, bolognese sauce and now meatballs!

My ingredient list is short (just how I like it!) with just cut up eggplant, diced onion, and white beans. I added in almond flour to replace bread crumbs which are traditionally used in meatball recipes. After chopping up the eggplant (skin on) and onion I roasted them in the oven until soft. Added them to a food processor with the remaining ingredients and blended well. I left them a little chunky so they didn't look pureed - that you don't want!
Rolled them into meatballs until I got 12 even sized ones and put them back in the oven for about 30 minutes until they firmed up and turned a little brown. Now, these will be a bit softer than your usual meatball so handle with care. Or you can mix them in well with your noodle of choice and make it like a bolognese! Yum!

I went with carrot zoodles from Trader Joe's (you can find them in their freezer section) The only ingredients are carrots and sea salt! Score! Super easy to prepare while the eggplant meatballs are cooking. Or go for another zoodle or pasta of choice. Since these make a dozen it is great for leftovers the next day or even lunch for the week!
Even if you are not following a plant-based lifestyle it is good to go meatless one night a week. Not just for your health but for the health of the environment!
Don't forget to tag me on Instagram if you give them a try!
Ingredients:
1 medium unpeeled eggplant (cut into bite-size pieces)
1 small onion, chopped
1 tbs chopped garlic
1 can low sodium white beans, rinsed
1 cup almond flour
Fresh parsley
1.5 tsp Trader Joes 21 Seasoning Salute (or other fav seasonings)
Low sodium marinara sauce or can chopped tomatoes
1 tbsp olive oil
Instructions:
1. Preheat oven to 375f
2. Spray pan liberally and add chopped eggplant, onion & oil to baking sheet. Mix well.
3. Bake for 15 minutes until soft
4. Let cool a few minutes then pour into food processor or blender
5. Add remaining ingredients (except marinara sauce)
6. Blend until combined but still chunky
7. Roll into 12 even balls and add back to the baking sheet (sprayed liberally so not to stick)
8. Bake in the oven for about 30 minutes until they firm up and get brown on top.
9. Remove from oven and let cool a bit before handling.
10. Add to favorite pasta or zoodles with heated up marinara sauce. Or make a meatball parm sandwich!
Enjoy!
Creamy Pasta Primavera (Vegan)
Growing up Italian it was pasta and meatballs every Sunday...and sometimes Monday, Tuesday, ......you get the picture! LOL! Don't get me wrong I still love pasta and yes I do still indulge in it sometimes.

Plus with all the healthier options out there today you can really enjoy it again! I have been trying out the bean pasta's and some are good and some not so much. My favorite is Trader Joe's red lentil pasta. It is actually very tasty and has a pretty red color from the red lentil flour, which by the way is the only ingredient!

Piled with my favorite veggies like broccoli, mushrooms and red pepper this dish is sure to please that pasta craving with a nutritional boost. I did go with fresh vegetables this time and roasted them up plain in the oven. Just a quick chop and roast is all they need. While they are roasting is when I cooked the pasta and made the walnut sauce. I love seeing a rainbow of colors in my bowl - so pretty!

The sauce is simple as it only calls for vegetable broth, walnuts, fresh parsley & cilantro, red curry paste, lemon juice and salt & pepper. Depending on how spicy you like it you can always add more red curry. Lately, I have been enjoying my foods with extra heat! I hear it revs up your metabolism too?! (more on that with a later post!)
What I love about cooking these types of recipes is the versatility - you can literally use any veggies you like and mix it up the next time! I would love to hear what your favorite veggies are for this dish so don't forget to comment below and tag me on Instagram to share! I am looking for fresh ideas!

And yes this is great for meal prep! It will keep in the fridge for a few days as the sauce marinates more into the veggies. Yum! I even added a sprinkle of hemp seeds on top or you can always go for fresh parm to really keep it Italian!
Ingredients:
Sauce:
2 cups walnuts (chopped)
2 cups vegetable broth
1/3 cup parsley (fresh)
1/3 cup cilantro (fresh)
3 tbsp lemon juice
4 garlic cloves chopped
2 tbsp red curry paste
Salt & pepper to taste
16 oz pasta of choice (I used TJ Red Lentil Pasta)
3 cups fresh broccoli
1 red bell pepper chopped
8 oz fresh mushrooms (cut into bite-sized pieces)
1 cup cherry tomatoes (halved)
Instructions:
1. Preheat oven to 400f
2. Chop all veggies into bite size pieces and lay on a greased baking sheet to bake for about 20 minutes until tender.
3. Put all sauce ingredients into a blender and combine well.
4. Cook pasta according to package directions.
5. Once veggies and pasta are done add to large bowl.
6. Pour sauce over the veggies & pasta and mix well to combine.
7. Enjoy right away, at room temp or chilled.
8. Can be kept in the fridge for a few days - great for meal prep.
Moroccan Butternut Squash Stew
It seems the groundhog was right this year as Winter is holding on longer than any of us care for! So soup season is still going strong in this household. I do love making a big batch of soup as it will last all week for lunch or at least 2 nights of dinner. Even great for freezing leftovers for another date.

I love cooking with butternut squash in so many recipes from baked to mashed to stews. Let's highlight some of the health benefits of this squash - which by the way is technically a fruit as it has seeds in it! Containing potassium, B6, folate, carotenoids (protects against heart disease) and vitamin C just to name a few!

Ok, onto the good stuff! This just smells amazing when it is cooking. I love the colors it has too - you know you are getting vitamins and nutrients with this rainbow! The ingredients are simple with fresh spinach, can of tomatoes, chickpeas, cooked rice and squash I purchase already peeled and chopped - super time saver!
The aromatics are my favorite part I think! With curry powder, ginger, paprika, fresh parsley and cayenne giving it that heat this one dish gives your taste buds a flavorful punch.

I just enjoyed another bowl for lunch today as I dream about the warmer weather. Pairs nicely with a piece of sprouted grain bread to dip in too! Yum! Total comfort style food!
Comment and share with me on Instagram as I love to hear from you and see your creations!
xo-cherise
Moroccan Butternut Squash Stew
Recipe Here
Ingredients:
4 cups low sodium vegetable broth
3 cups chopped butternut squash (cut into bite-size pieces)
1 15 oz can diced tomatoes (look for no salt added if possible)
1/2 cup chopped onion
4 garlic cloves, chopped
1 5oz package fresh spinach
1 15oz chickpeas (rinsed and drained)
1 cup cooked brown rice (could sub another grain like quinoa)
2 tsp curry powder
1 tsp cumin
1 tsp paprika
1 tsp ground ginger
1/4 tsp cayenne pepper (adjust according to your liking for heat)
1 handful fresh parsley, chopped
Lime juice (optional)
Instructions:
1. In a large pot combine all ingredients except chickpeas, rice, spinach, parsley & lime juice.
2. Simmer about 20 minutes until squash is tender.
3. Add in torn spinach leaves, chickpeas, rice and heat through.
4. Top with fresh parsley and 1 tbsp lime juice.
Will stay good in the fridge for 4-5 days or freeze longer. Great for meal prep!
Enjoy!


Beanless Veggie Burgers
Sometimes a girl just wants a burger style meal. When I did eat meat I loved me a good turkey burger (I was never a big red meat eater my whole life) Piled with sauteed onions, tomato, lettuce, avocado....yum! I still enjoy a good burger these days....just a veggie one! I have made black bean burgers and Mediterranean style burgers but I wanted to go for a bean-less one this time as sometimes well, beans don't always agree with me!

I am loving cauliflower and how versatile it is especially for our plant-based eaters. You can rice it, mash it, pizza it, roast it, taco it and burger it! So many options! Who knew?! LOL! Cauliflower is not the only star of this show, sweet potatoes make a cameo as well. Roasted both veggies and then blended them together to make into a smashed consistency. Just enough so you can mold them into patties. I like to leave some chunks in there for a meatier taste too! But totally optional. All you need for this recipe is;
Cauliflower
Sweet Potatoes
Almond Flour
Fresh Spinach
Hemp Seeds (optional)

I always like to add in my greens so I tore some fresh spinach leaves and added those in as well. Oh, and my secret super-foods went in as well - hemp seeds! Love these for plant protein and healthy fats. I used my egg mold to form them into perfect looking patties - aren't they just perfect!?
Baked them in the oven for about 20 minutes, flipping halfway through. Just be very careful with the flipping as they fall apart easily. Just treat them with care and if they fall apart no worries just mold them back together and all is well!

However, you like your burger go for it! Maybe with a side of sweet potato fries, a salad, on a bun piled high with toppings? I made these for my lunch prep over quinoa and mixed greens. Topped with sauteed onions and a slice of tomato. I also used TJ's Green Goddess dressing over it all - delish!! These burgers are well reheated in the microwave and I even froze some for lunch or dinner another time! Maybe even pan fry them to make them a little crispy? Either way, I am adding these to my 'burger' rotation!
If you do too be sure to tag me on Instagram and share the love!
Ingredients:
1 small head cauliflower - roasted and cooled
1 small sweet potato - roasted and cooled
1 egg
A handful of fresh spinach leaves - torn into smaller pieces
1/3 cup almond flour
1/2 tsp smoked paprika
1/2 tsp cumin
1/2 tsp chili powder
1/2 tsp garlic powder
1 tsp hemp seeds
Instructions:
1. After you have roasted and cooled the veggies (I just roasted mine plain at 400F for about 20 minutes) add them to a food processor and blend until into a smashed consistency - can leave a little chunky to texture.
2. Add the veggie mix to a large bowl along with the remaining ingredients and mix well together.
3. Form into patties and place on a lined baking sheet. You can set in the fridge for about 30-60 minutes to have them firm up a bit but I just went ahead and cooked mine in the oven at 425F for 20 minutes flipping halfway through.
4. Remember to be gentle when flipping and if they fall apart no worries just form them back together again. Yes, they will be soft but still yummy!
5. They can be stored in the fridge for a few days and even frozen individually wrapped for later enjoyment.
6. Add your favorite toppings like avocado, tomato, sauteed onions.....
xo-cherise
*recipe adapted from rachlmansfield.com
Roasted Cauliflower Tacos
Your Taco Tuesday is about to get a makeover! Drop the beef and pick up that cauliflower! We all know cauliflower is having it's moment right now from pizzas to rice to now taco's! Geez, I hope we don't find ourselves in a cauliflower shortage!

I have to say these came out really tasty with all the right seasonings, roasted until slightly browned and then topped with my avocado yogurt dressing. The best part about tacos is that you can top it with whatever you like! Salsa, avocado, guac, cabbage slaw, jalapenos for some heat...you get the idea! These are totally customizable!

Building a taco station is always fun too! This way your guests can pick and choose their creations! Since it was just me, my hubby and son (no, my daughter will not partake in taco night!) I just had cabbage slaw (which I bought pre-made - shortcut hack!) with my avocado yogurt dressing - totally forgot the pineapple salsa that we love from Trader Joe's but will not forget next Taco Tuesday!

The ingredients are minimal but the taste is not! You could also roast up some tomatoes or peppers and onions to add? My mind is constantly thinking about more food options! Either pile it on or keep it basic - either way, this recipe will not disappoint! For the tortillas, I used a sprouted grain one from Whole Foods. Ezekiel is another good option or Siete has almond flour options that are great too!
So grab your spices, cauliflower, and toppings and let's start this Fiesta!!!
Remember to tag me on Instagram with your creations. Share the love!
Ingredients:
1 head cauliflower, trimmed & sliced florets
2 Tbsp olive oil
1/2 tsp chili powder
1/2 tsp garlic powder
1/2 tsp cumin
1/2 tsp cayenne pepper (more if you like heat!)
Salt to taste
Fresh chopped cilantro leaves (1/4 cup)
1 bag cabbage slaw (or own shredded lettuce)
For Avocado Sauce:
1 ripe avocado
1 cup plain Greek yogurt
1 tbsp lime juice
the same seasoning as above you can sprinkle in while blending
Instructions:
1. Preheat oven to 400F
2. Line a baking sheet with parchment paper (easier clean up)-spray liberally.
3. Add olive oil seasoning to a bowl and whisk well together. Then add cauliflower and mix well to coat evenly.
4. Spread cauliflower onto pan evenly and roast for 30-40 minutes - depending on your oven and how 'roasted' you like them.
5. While cooking prepare avocado sauce by adding all ingredients into a blender and mix well. Set aside.
6. Option to heat up tortillas in oven for a few minutes before assembling tacos.
7. Once cauliflower is done, prepare your taco station and assemble!
8. Start with cabbage slaw, top with cauliflower and any other toppings you chose than a dollop of avocado sauce.
9. Roll 'em up and enjoy!!
xo-cherise


Mediterranean Chickpea Salad
When living that plant-based life chickpeas become a girl's best friend as they are a great source of plant protein along with many other health benefits. They contain zinc which is a great immunity booster, fiber for digestive health, along with copper and iron! Who knew?!

It is hard to say who is the star of this show as there are so many flavors that come together. They all play important roles as the supporting cast in this dish! I am all for mixing up ingredients and trying new combos to see what works. Food needs to dance on my palate and feel like a party, right?! I think this dish is a party alright!

Just look at the rainbow of colors going on here! There is a mix of salty and sweet from the kalamata olives & feta to the chopped dried dates (you can sub raisins too) The crunchiness of the carrots and creaminess of the chickpeas - I think this is a party waiting to happen! Yes, I am that passionate about food! lol!

The best is that it this is a one bowl meal (after you cook the quinoa) everything goes into 1 bowl - I love recipes like this as it means less mess and less clean up time. And more time to enjoy this yummy dish! I served this for dinner and it was definitely filling. (although my husband didn't think so - he misses his chicken at dinner I think lol!) You can always add any protein that you wish to top it off. I can't wait until Summer to bring this to BBQ's as it will hold up well as a chilled side dish.

This is also a great meal prep idea. Just keep the salad greens separate until ready to eat. Then add to chickpea mixture and drizzle dressing over. Voila! Lunch is ready and served! Remember to get creative and swap for what you desire. Maybe goat cheese, toasted walnuts, farro...the possibilities are endless my friends! Enjoy!
Remember to pass this onto a friend and tag me on Instagram if you give it a try!
Ingredients:
1/2 cup uncooked quinoa
1 can chickpeas (rinsed & drained)
2 cups shredded carrots
1 bag of mixed salad greens (arugula, spinach, Swiss chard..)
1/3 cup pumpkin seeds (or any toasted nuts you prefer)
1/3 cup feta or goat cheese (can omit for vegan)
1/4 cup chopped dates (or raisins)
Chopped mint to sprinkle
Dressing:
3 Tbsp EVOO
3 Tbsp lemon juice
1 tsp honey mustard (or Dijon)
1 tsp honey (or maple syrup if vegan)
3/4 tsp chili powder
Salt to taste
1/4 tsp cinnamon
Directions:
1. Cook quinoa according to instructions.
2. While cooking, make the dressing by placing all ingredients in a measuring cup and mixing well to combine.
3. Place carrots and chickpeas in large bowl. Add quinoa once cooked and cooled a bit.
4. Add mixed greens and pour dressing over and mix well.
5. Add pumpkin seeds, feta, dates, and mint (or whatever toppings you chose).
6. Dish and enjoy!
7. Can be stored and saved for later or meal prep, just keep salad greens and dressing separate and assemble at time of consumption.
xo-cherise
*reciped adapted from wellplated.com


Spaghetti Squash Bowls
Did you know that spaghetti squash gets its name from when it is cooked the inside flesh comes out looking like well, spaghetti?! What I love about this squash is that while we think Fall, squash is available year-round in most grocery stores.
Let's start with the many health benefits of this squash. It hosts a wide range of vitamins such as C, A, B-6, K, folate, & riboflavin to name a few. Plus, did you know that it is more beneficial to get your vitamins from plant-based foods than a multi-vitamin? "This is because foods have several chemicals that work together to make the vitamins function more efficiently."
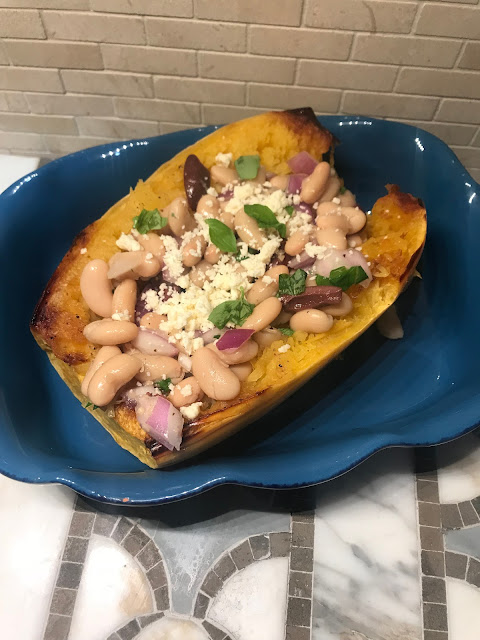
OK, enough sciencey stuff lets get to the food! Have you ever tried to cut a spaghetti squash in half? Great arm workout for sure! lol! You will need a super sharp knife and to be very careful. Once you cut off the ends you slice it down the middle and scoop out the seeds. Rub it down with some good quality olive oil inside and out and sprinkle with salt & pepper.
Place cut side down on a parchment-lined baking sheet and bake for 40 minutes at 400F. While cooking you can prepare the tasty Mediterranean filling that will be stuffed inside. I am talking about chickpeas (great plant-based protein), red pepper, kalamata olives (what is a Mediterranean dish without these?!) and a sprinkle of feta. Oh and topped with a parsley pesto sauce, this dish takes me away to what I feel Greece would be like! Sigh....One day!
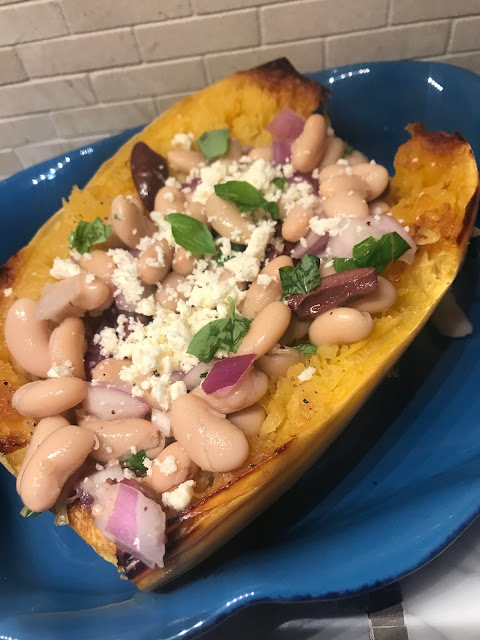
This recipe is just a flavor explosion in your mouth! Even my hubs who is often skeptical of my plant-based dinners really enjoyed this one! You could also cook an extra squash and keep the filling & dressing separate for dinner or lunch the next day. Great for meal prep! Great for low carb! Just great all around!
Comment or tag me on Instagram if you give it a try - love to see your recreations!
Ingredients:
1 Spaghetti Squash (this is for 2 servings - grab 2 squash for 4 servings & divide filling evenly)
1 can chickpeas (rinsed)
1 red pepper, chopped
1/3 cup red onion, chopped (could soak in water to take the bite away)
1/4-1/2 cup sliced Kalamata olives (depending on how much you like them!)
2 Tbs Extra Virgin Olive Oil
1 garlic clove, chopped finely
1 Tbs lemon juice
Fresh parsley and basil for garnish
Salt & Pepper to taste
Crumbled feta cheese (optional)
Pesto Sauce:
1/4 cup pumpkin seeds
1/2 cup fresh parsley & basil
2 Tbs lemon juice
2 Tbs water
1/4 cup EVOO
Salt to taste
Instructions:
1. Preheat oven to 400F. Cut off top and bottom on squash (use a very sharp knife) then cut down the middle.
2. Scrape out seeds and discard (or you can roast them!) Drizzle and rub with 1 Tbs olive oil, inside and out. Then sprinkle with salt & pepper.
3. Place cut side down on parchment paper and bake for 40-50 minutes (depending on oven). Check with a fork when done. Should be soft.
4. Prepare chickpea salad, in a large bowl combine chickpeas, pepper, onion, olives, chopped basil & parsley, lemon juice, 1 Tbs olive oil, and salt. Combine everything well and set aside.
5. For the pesto, in a food processor add all ingredients except olive oil. Begin to process slow and then slowly add in oil. Stop to scrape down sides as needed. Continue until well blended.
6. Once the squash is cooked through and cooled to handle, run a fork in the middle to make it spaghetti like then add filling to squash bowl. Top with pesto dressing and dig in!!
7. If using for meal prep, store squash, filling and pesto separately and assemble when ready to eat.
xo-cherise
recipe adapted from cookieandcake.com


Acorn Squash for Breakfast
OK stick with me here. I know it sounds unconventional but it is always a good idea to try something new, right? Even if that means trading in your eggs or oatmeal at breakfast for.......squash!? Yes! Read on my friends!

I just may be holding onto the last of the winter veggies before they are gone for Summer. I love me some squash as it is so versatile and full of vitamins! Did you know acorn squash contains vitamin A, niacin, folate, thiamine and vitamin B-6, but it is an especially good source of vitamin C. A 1/2-cup serving of cooked acorn squash provides approximately 20 percent of the recommended daily allowance of vitamin C. Oh yea! And that my friends are what you will be getting with this savory and unconventional breakfast dish!
Also, it is good to have that extra C in the Winter months!

Grab 1 or 2 squash, slice in half and scoop out the seeds. Lay them face up on a foil lined pan and rub them with coconut oil and cinnamon. I then added a teaspoon of coconut sugar to the middle of the squash - the coconut flavors while subtle really make this a savory dish! Yum! Bake until the squash is tender to scrape with a fork - around 45 minutes (depending on your oven & squash size)

Once cooked and cooled I added in a cup of Sigg's vanilla yogurt (so creamy) you can also opt for plain Greek yogurt as with the coconut oil, cinnamon and touch of honey you could go without the added sweetness of flavored yogurts.
Try to go for yogurts without added fruit as they will be lower in sugar - I look to stay under 10 grams of sugar. I find Sigg's vanilla to be one of the lower sugar options for a vanilla flavor. Top with pecans or other nuts that you desire such as almonds or cashews, maybe? Drizzle a teaspoon of honey and sprinkle more cinnamon if desired. Get ready for a flavor explosion!

Since I eat my breakfast at work I left the acorn naked (without the yogurt & toppings) covered in the fridge. Heated it up at work and then added the yogurt and toppings. I scraped that bad boy down to the skin & it was soooo yummy! Plus it was filling so I was good until lunch!
Great meal prep idea for breakfast. If you buy 2 you have breakfast taken care of for 4 days! Filled with protein, vitamins, and fiber you can't go wrong!!
Be sure to tag me on Instagram if you give these a try! Would love to hear your comments!
Ingredients:
1. 1 or 2 medium Acorn squash (if using 2 double the below ingredients)
2. 2 tsp coconut sugar
3. 2 tsp honey (or maple syrup if vegan)
4. 2 tbsp chopped pecans or walnuts (or other favorite nuts)
5. 1 cup Sigg's yogurt (or other yogurt-low sugar, option for coconut yogurt if vegan)
7. 2 tsp coconut oil (melted)
Instructions:
1. Preheat oven to 400f
2. Line a baking sheet with foil and spray with oil
3. Cut acorn squash in half and rub with melted coconut oil and cinnamon.
4. Add a tsp of coconut sugar to each half.
5. Bake for 45-50 minutes or until fork tender.
6. Let cool for a few minutes before adding yogurt, honey, and pecan.
7. If saving for later consumption, cover in an airtight container in the fridge for a few days. Then reheat and add in yogurt and toppings.
8. Enjoy!
*recipe inspired by ambitious kitchen
Ricotta Cashew Cheese - Vegan Style!

Italian vegans rejoice! Being Italian and loving cheese is not easy when trying to limit dairy intake. Most will wonder why one would limit or give up dairy if not allergic. On my continuing journey to power myself with the ever-changing world of health, I have found many reports where limiting dairy is not such a bad thing. Most forms can be high in fat and calories, upset your stomach GI track plus there is no scientific evidence that dairy is good for your bones or prevents osteoporosis and has been linked to colon cancer. (founded by Dr. Hyman)
This is not to say that I don't indulge in cheese, yogurt or gelato at times, I just choose to limit my overall consumption. So when I kept seeing options for a vegan ricotta cheese I had to further investigate. Fresh ricotta cheese is one of my all-time favorite cheeses! When we were in Italy it was served fresh every morning with toast, honey and fresh fruit - delish! If you are vegan or limiting dairy you may have heard of cashews taking over the spotlight when it comes to a cheese or a creamy dressing option. That is what is going on here with this recipe - cashews!!

First, you soak your cashews overnight to get them ready to blend into a creamy 'cheese'. Add salt & pepper to taste, a smidge of lemon juice and almond milk to thin it out to your liking. Make sure you scrape down the sides of the blender to get all the cashews blended together - you don't want any chunks if you are looking for that creamy consistency. Just look at the yumminess below!

Now the hard part...what NOT to put this on!! You could literally just eat it with a spoon - but let's savor it to pair it with some main dishes. Of course, it will go well with eggplant parm, stuffed shells or lasagna or any dish that calls for ricotta cheese, really! I actually added it to my vegetable soup this week as a topping and it blended right in for a salty taste. Try it for a breakfast treat spread over toast with honey and fruit like us Italians! So many ways to enjoy it! Would love to hear from you and how you used it! Make sure to tag me on IG!

Ingredients:
1 cup chopped cashews (soaked overnight)
2 tbs unsweetened almond milk
2 tbs lemon juice
1/4 tsp garlic powder
Salt & Pepper to taste
Instructions:
1. After soaking cashews, rinse and drain them.
2. Add to food processor or high-speed blender
3. Add garlic, lemon juice, and salt/pepper
4. Blend cashews until creamy consistency - scraping sides as needed.
5. Add in almond milk slowly until smooth - if need to add more.
6. Sprinkle fresh basil (optional)
7. Enjoy
Simple Lentil Meatballs
File this under 'outside my eating zone' recipes! lol! Lentils were not a food that I often if ever had much of before embarking on my plant-based journey. The most I have ever ventured with lentils was maybe lentil soup and even then I sometimes was not a big fan. However, I have learned that they can be a staple ingredient for vegetarians and vegans as they boost fiber, protein, VitaminB, and iron. Which can be hard to come by if you are on a plant-based diet.
During my meat eating days we often had meatballs, I mean I did grow up Italian with Sundays catered around meatballs and pasta. Yum!! I often made my grandma's meatball recipe with sauce on Sundays and as a family, we always opted for the meatball appetizer at any restaurant we go to. We prided ourselves on being meatball concourses! While I may no longer take part in this activity when we go out my family has carried on the tradition. And that is where this recipe inspiration came from.
I missed my meatballs - not so much the meat part just being a part of the meatball events. I have made eggplant meatballs as well and those are one of my favorites but after learning about the dietary benefits of lentils I wanted to give it a go.

Again, minimal ingredients as you know that is my go to. I am busy working mom and wife so the less the ingredient list the better for me! All that is included are cooked lentils, egg, garlic & shallot, tomato paste, and Italian seasonings.
Yes, these are fragile so be patient and gentle when forming them into these little 'meatballs'. You could attempt to pan fry them to give them a crispy outer coating but like I said they are fragile and fall apart easily so I decided just to bake them in the oven.
While they were cooking I sauteed the frozen carrot noodles that I often have on hand from Trader Joe's (grab them when you see them as they are so versatile and are literally just carrots!) Added in some good quality tomato sauce and once the lentil meatballs were done I topped them over the carrot zoodles with a fresh sprinkle of parsley and voila....dinner is served!
Could be saved for leftovers - maybe even meal prep but not for more than a day or 2 in my opinion. Get creative and add them over zucchini zoodles or spaghetti (maybe gluten-free or whole wheat?!)
Let me know if you decide to cook outside your comfort zone with these simple lentil meatballs!!
Ingredients:
1.5 cups cooked & cooled lentils
1 Tbs tomato paste
I egg
1 shallot, minced
2-3 garlic cloves, chopped
Dried Italian seasonings (parsley, basil, oregano)
Fresh parsley (optional)
Salt & Pepper to taste
Instructions:
1. Cook lentils according to package directions & preheat oven to 375.
2. Add cooked and cooled lentils to a food processor, egg, garlic & shallot, (option to sautee garlic & shallot in 1 tbs olive oil before adding to mix) Italian seasonings and a sprinkle of S&P.
3. Blend well together until combined - should still have some lentil lumps - not a full puree.
4. Use a tablespoon to scoop out round like sizes and carefully mold with fingers. If too dry add a smidge of olive oil. Remember - these are fragile so be patient.
5. Arrange on a well-oiled baking sheet (I like to put on a slip mat for easy clean up)
6. Bake for 10 minutes - check and gently flip. Cook for an additional 10-15 minutes.
7. Let them cool completely to firm up more.
8. Serve over carrot zoodles or your favorite pasta-like dish.
9. Enjoy!
xo-cherise
Mediterranean Power Bowl
While traveling in Aruba for my big 4-0 celebration my husband was looking for something to eat before boarding the plane back home. Like me, he looks for the healthier option and came across a spot that had these power bowls. All looked really yum but he went with their Mediterranean bowl as we both love us some European inspired food! Ever since then he has been asking me to recreate it at home so this week we decided to meal prep it for our lunches together. Simple ingredients and it really didn't take long to put everything together.

The base is quinoa which I cooked the day before so it was ready to measure out. I love Trader Joes Organic tri-color quinoa but any brand will do. Then we topped it with chopped red onions, baby cucumbers, kalamata olives, artichokes and sprinkled feta cheese on top. We also ended up adding fresh spinach leaves and cherry tomatoes (not pictured though) as an afterthought because well why not! My husband will be adding in grilled chicken to his bowls. I think shrimp or hard boiled eggs would go great too! I am counting the quinoa as my plant protein for this bowl.

You could use any dressing that is your favorite but I made a roasted red pepper sauce that really married all the ingredients together deliciously! Just pick up a jar of roasted red peppers or from the Mediterranean bar at our local food store (or even roast your own!) along with 2 tbsp good quality extra virgin olive oil, garlic, paprika, cumin, S&P and some slivered almonds. Blend well together until a smooth creamy sauce is formed. I portioned out some into a small mason jar (in the pic above) to bring with me to work. The remaining ingredients I left in a bigger mason jar for my husbands half. I love mason jars for storage and they are so cheap to find at your local craft store!
These grab and go bowls are great for meal prep! I purchase them from Amazon and use them often! Sunday's is when I plan and prep my lunch for the week and prepare these bowls. This way in the morning before work I literally just grab & go! No excuses! You know what they say, fail to plan - plan to fail. I will also grab an apple to go with my power bowl. I love the crunch and sweetness after my lunch - satisfies any sweet cravings that I might have.
Over the years meal prep has been an integral part of my success to keeping those unwanted pounds off, saving money by cooking at home, knowing your ingredients and staying away from making impulse food decisions. It is a win-win all around! New to meal prepping 101? Why not start with giving these bowls a try and see how it goes! Message me if you need ideas or guidance - I love to meal prep!

Love this recipe? Comment and share with your friends - tag me on IG too! Would love to see your creation!
4 servings
Ingredients:
2 cups cooked quinoa
1/2 cup olives - chopped
1/2 cup red onion - chopped
1 cup diced cucumbers
1/2 cup crumbled feta
1 can artichoke hearts - drained and chopped
Fresh spinach leaves - optional
Diced tomatoes - optional
Red Pepper Sauce:
1 jar roasted red peppers - drained
2 tbs olive oil
1/4 cup slivered almonds
1 clove garlic
1 tsp paprika
1 tsp cumin
sprinkle red pepper flakes (optional)
S&P to taste
Blend together in food processor until smooth.
Instructions:
For each bowl divide evenly cooked quinoa (I used 1/2 cup) with olives, red onion, cucumbers, feta, artichokes and spinach and tomatoes if using.
Add chicken or other protein or keep separate if you want to heat it up before adding into bowls.
Keep red pepper sauce separate until ready for consumption - then drizzle on.
Mix everything well and enjoy!!
xo-cherise
Vegetarian Chickpea Stew
I could seriously eat soup every day in the colder months - it is warming, healthy, made with simple ingredients and it makes a big batch to last for days or can feed a family! To make it even heartier I like to use ingredients with some depth to make it not only more filling but stew like - always good for dipping bread into! Yum!

To keep this soup filling and you satisfied I have added in fibrous chickpeas (also a great source of protein for those vegetarians/vegans), sweet potatoes for complex carbs and a touch of sweetness & fresh organic baby spinach for your healthy greens. Warming aromatics such as ginger, cinnamon, coriander & cumin are included in this one-pot wonder of warm goodness!
You could throw all the ingredients in your crockpot and let it simmer all day and your house will smell wonderful, or cook it on the stove for around 40 minutes (I think your house will still smell wonderful) or maybe even in the latest craze - Instapot! Note that I have not tried it in an Instapot myself but would love to hear if you do!!
Leftovers can be stored in the fridge for 3-4 days or even frozen. Great for meal prep too! You can swap the sweet potatoes for regular or spinach for kale - customize it to your liking! That is the beauty of cooking healthy!!
Ingredients:
1 large sweet potato chopped
1 can chickpeas rinsed & drained
4 cups vegetable broth
1 package fresh spinach
1 onion diced
1 tsp olive oil
2 cloves garlic chopped
1 tsp coriander
1 tsp ground ginger
1 tsp cumin
1/4 tsp cinnamon
salt & pepper to taste
Instructions:
1. In a large pot heat the olive oil over medium heat and cook the onions and garlic until fragrant - make sure not to burn.
2. Add all other ingredients except spinach.
3. Cook 35-40 minutes and stir often. Potatoes will soften.
4. Add spinach and let wilt.
5. Enjoy
xo-cherise

Lemony Hummus Pasta & Veggies
Oh, yea! I am loving hummus these days as chickpeas are a great source of fiber and protein for a plant-based lifestyle. So when I decided to make it into a dressing over my veggies it was a match made in heaven! You could easily make your own hummus but I went with store bought from Whole Foods as they make their own with minimal ingredients and it tastes yummy! I chose the garlic flavor and added in lemon juice along with some pasta water to make it creamy and dressing like.

This recipe is versatile in that you can swap for any veggies you like! I used broccoli as it is one of my favs (plus my family loves it too) and it is a good source of iron and several vitamins, mushrooms as they are having their moment right now - I think 2018 will be the year everyone discovers mushrooms superpowers! Added in roasted red peppers, seasonings and roasted them all up!
 I mean just look at all the pretty colors! You know you are getting in various vitamins and nutrient dense foods (keep you fuller longer) when you see a rainbow of colors (and not artificial ones!) Let's talk nutrient dense foods for a minute. What does this mean exactly? Well, when you eat more nutrient-dense foods like veggies you will feel fuller longer & with less portion sizes as well. Did you ever stop and think how easy it is to eat a big ol' bowl of pasta but you probably couldn't say that about the same big ol' bowl of broccoli?! However, with fewer calories and more nutrients, the big ol' bowl of broccoli will keep you fuller longer and you will avoid the infamous 'carb crash'.
Speaking of avoiding a carb crash, for the pasta I used a red lentil pasta that I buy frequently at Trader Joes - there are an impressive 13 grams of protein in there too! You could also use zucchini noodles, sweet potato noodles or even opt for cauliflower rice - the possibilities are endless! Adding lean protein is an option as well, think chicken, shrimp, tofu if these are what you like.


Speaking of avoiding a carb crash, for the pasta I used a red lentil pasta that I buy frequently at Trader Joes - there are an impressive 13 grams of protein in there too! You could also use zucchini noodles, sweet potato noodles or even opt for cauliflower rice - the possibilities are endless! Adding lean protein is an option as well, think chicken, shrimp, tofu if these are what you like.
 |
| Creamy Lemony Garlic Hummus |

How will you eat your lemony hummus veggies? Comment and share to let us know!
xo-cherise
Ingredients:
1 package Red Lentil pasta (or other alternatives)
1 medium head broccoli chopped
8 oz sliced mushrooms
1/2 cup roasted red pepper - chopped
3/4 cup hummus (flavor of choice, I chose garlic)
1/4 cup lemon juice (for hummus)
1 tbs olive oil
2 garlic cloves minced
Salt & Pepper to taste
A handful of fresh parsley
Reserve 1/4-1/2 cup pasta water (if using pasta)
Instructions:
1. Preheat oven to 400f
2. Line baking sheet with parchment or tinfoil (easier cleanup)
3. Place all veggies in a bowl with olive oil (drain red peppers from oil or use a tbs of the oil from the jar) along with salt & pepper to taste.
4. Mix well so all veggies are coated nicely.
5. Spread onto baking sheet and bake for 20 minutes - mixing halfway through.
6. While veggies are roasting, cook pasta & make hummus sauce. Add hummus, lemon juice, garlic, S&P to taste and even red pepper flakes if you like in a small bowl and mix well. Once pasta is cooked thin out with reserved pasta water.
7. Add cooked pasta to a bowl, top with roasted veggies and drizzle hummus sauce.
8. Top with fresh parsley and any additional seasonings you like!
9. Enjoy!
recipe adapted from fooduzzi
Chickpea Salad Sandwich
I am always looking for something new to create in the kitchen to prevent food boredom! As of today, (Jan. 2018) I am still sticking with a more plant-based diet and so far I am feeling really good about it! I have noticed that my bloating feeling I usually have and stomach pains have gone away - so something is working!
When I made a big batch of tomato soup the other day I felt like having a toasted sandwich with it - maybe a grilled cheese I thought? (I have not gone vegan so I still have cheese here and there) then I came across a recipe for a no tuna sandwich that sounded perfect on crunchy toast! I thought that would pair well with my warm tomato soup during these cold Winter months in Jersey...brrr....


I started with mashing chickpeas (or any white bean will do - maybe even black?!) in a large bowl then adding in this honey mustard, organic tahini sauce (Why am I just jumping on this bandwagon now?! I could use this stuff on everything! LOL), chopped onions, celery and pickles...yes pickles! Add in your fresh sea salt and ground pepper and whatever other spices or seasonings you like - I added in hot sauce to mine personally but left it out for the fam. Mix all the ingredients until well blended and that's it! Super simple, right?!


And yes I paired it with my tomato soup for the perfect warming meal on that cool winter day. It was hit my the hubs (who has been taking this plant-eating lifestyle rather well!) and my son enjoyed it too!! (as you may know, my daughter doesn't eat outside her comfort zone, sigh!) This is also perfect to make for meal prep as it will stay fresh in the fridge for a few days- just assemble the sandwich right before eating or even have it over a salad! Great snack with crackers & fruit too!
If you give it a try please comment and share as I would love to hear about it!
xo-cherise
Ingredients:
1 can chickpeas, rinsed & drained
1 tsp honey mustard
1 tbs maple syrup or honey
3 tbs tahini
1/4 diced onion (red or white)
1/4 cup chopped celery
1/4 cup chopped pickle
Salt & Pepper to taste
Dash of hot sauce if desired
Instructions:
1. Pour drained & rinsed chickpeas in a large bowl and mash with a fork - you can leave some clumpy for texture.
2. Add in remaining ingredients. Taste and adjust as needed.
3. Toast bread and scoop about a 1/2 cup onto one slice of bread then add your toppings on to the other.
4. Put together and enjoy!
*recipe adapted from forksoverknives
Super Simple Falafel's
As the holidays are finally over everyone starts up their resolutions and they usually start with getting healthy & fit, right?! Usually along with those goals are to start meal prepping to stay healthy and fit - I love to meal prep - yes I am one of those people but let me tell you how much it has helped me over the years with keeping those unwanted pounds away. Plus I just feel healthier eating homemade meals with ingredients I know are healthy and can pronounce. It is so much better than being stuck somewhere with no food and just grabbing whatever is convenient and usually not a good choice. This week I made a batch of these falafel patties to go over my salad for meal prep. Along with a homemade lemon tahini sauce as a dressing! (Recipe below as well!)

They were super simple to make as I used canned chickpeas (you can use the dry ones just soak overnight) plus my new favorite condiment tahini along with the following seasonings to make them tasty - cumin, garlic powder, turmeric (healing benefits!), fresh parsley leaves, lemon juice and a chopped onion. After you rinse the chickpeas add them to a food processor along with all other ingredients and blend away! You may need to scrape down the sides in between. I used parchment paper on a baking sheet and sprayed it liberally so not to stick. Then scoop them into your hand and form into small round patties.

Cook at 400F for 10 minutes then flip carefully and cook another 10 minutes - they should brown slightly. I let them cool completely before transferring them to a sealed container as they will stay good in the fridge for a few days or you can freeze them. I added 3 into my salad bowl for my lunch for the week. I have plastic salad bowls that I prep on Sunday for my lunches so all I have to do is grab & go in the morning! I am planning on drizzling the lemon tahini sauce over everything and thoroughly enjoying my lunches this week! Try them out for your next meal prep - simple and healthy! A great way to stick with those New Year's Resolutions!

Ingredients:
1 can chickpeas (rinsed and drained)
1/4 cup chopped onions
1/4 cup tahini sauce
1 garlic clove
1 tbs cumin
1/2 tsp garlic powder
1 tsp turmeric
handful fresh parsley
1/4 cup fresh lemon juice
Instructions:
1. Preheat oven to 400f
2. Combine all of the ingredients into a blender and combine well. Scraping down sides as needed.
3. Line your baking sheet with parchment paper and spray liberally so not to stick.
4. Scoop the falafel mixture into your hands and make into small patties.
5. Place them on the baking sheet and bake for 10 minutes. Flip and bake for 10 minutes more.
6. Let cool completely and transfer to an airtight container.
7. Enjoy however you like!
Tahini Lemon Dressing
Ingredients:
1/4 cup lemon juice
1/4 cup tahini
2 tbs pure maple syrup
1/2 tsp garlic powder
S&P to taste.
Instructions:
1. Add all ingredients to a mason jar (or bowl) mix well and voila!
Drizzle that stuff on everything!


The Best & Healthiest Baba Ghanoush

If you are a fan of Greek or Mediterranean inspired foods than baba ghanoush is no stranger to you! Often used as a dip for veggies, pita bread or over the main dish is yum too! The only ingredients are eggplant, tahini, garlic, lemon and olive oil. A great healthy and low carb option as a dip! One cup can run you around 300 calories along with a healthy dose of good fats from the tahini (sesame seeds) sauce and good olive oil.
Pronounced ba·ba gha·noush it is an Arabic term with the word 'baba' meaning father and 'ghanoush' taking on a personal name. There are other variations that are made with mayonnaise or sour cream. But to keep it healthy we are omitting those and sticking with simple ingredients here!
Now I must admit working with Tahini is a new one for me but I found an organic one where the only ingredients are organic sesame seeds! This recipe is super simple (as I don't like to over complicate recipes myself and neither should you! lol!) Grab yourself a medium size eggplant and roast that baby in your oven at 400F for about 40 minutes. That's it! Don't rub it with anything, season it - nada! Just roast it until it starts to shrivel up like mine below;

Let it cool while you gather the other ingredients. You will need to peel the eggplant so make sure that it is cool enough to handle. You can add the other ingredients into a food processor and when the eggplant is cool enough peel it, chop it up and add to the food processor as well. I added in extra fresh cilantro, a few shakes of red pepper flakes (can omit if you want) and salt and pepper to my liking. You can experiment with other seasonings as well - try fresh parsley or basil maybe?
Blend everything on high for a few minutes until it looks well combined. Give it a taste test to see if you should add any more seasonings, lemon juice or olive oil to your liking.
If all is well, transfer to a bowl fitted with a lid and refrigerate until ready to use or portion out what you need for now and save the rest. Should last for a few days in the fridge, although you might finish it before then!

I am going to add this to my Greek Vegetable dish tonight as a dressing and save the rest as a dip for our veggies during the week. You can always heat up some good pita bread and dip it in or even over chicken - seriously the possibilities are endless! Now that you see how easy it is to make on your own no need for store bought anymore!! Enjoy and comment what you are going to pair your baba ghanoush with!!!
Ingredients:
1 medium eggplant
1.5 Tbs Tahini Sauce
4 cloves mashed garlic
1/2 fresh lemon juiced
1/2 tsp red pepper flakes
1 Tbs olive oil (more or less to taste)
1 handful fresh cilantro (or other fresh herbs such as parsley)
Salt & pepper to taste
Instructions:
1. Preheat oven to 400F
2. Place eggplant in a shallow baking dish on upper rack and bake for 40 minutes until shriveled (like my pic)
3. Let eggplant cool enough to handle then peel and chop.
4. Add other ingredients to a food processor then add in chopped and cooled eggplant.
5. Blend on high for about 30 seconds or until well combined.
6. Taste test and adjust as needed.
7. Can be refrigerated in a sealed container for 2-3 days.
Post. Like. Comment
xo-cherise


Tasty Thai Zoodles with Almond Butter

It is no secret that I have a major crush on almond butter and will find any reason to cook with it! Thai noodles are one of my favs as they are made with peanut butter (a close second to almond butter for me!) With my meal plan I have days when carbs are less than others and let's be honest, noodles have some of the biggest carbs (unless you go for the low carb kind or the new bean one's that are out that I love but still carbs in the end) With 'zoodles' having their moment with everyone spiraling everything these days I thought why not swap your traditional noodle with zoodles?!
The possibilities are endless to choose from with zucchini, carrot, sweet potatoes, beets to just name a few. However, if you are looking to stay low carb opt for the zucchini or carrot over the sweet potato. Another great healthy swap I use is coconut aminos over soy sauce. Less sodium and a great soy-free alternative.
I started with a beautiful rainbow of peppers and onions sautéing in the pan.

Once they were soft and fragrant I added in the zoodles of which I used zucchini and carrots (secret shortcut - Trader Joes has them already spiraled in their frozen section!) Once the veggies are cooked you can add them to a bowl so the zucchini doesn't become too watery (great tip I learned from another blogger!)
While the veggies are cooking you can start to simmer your almond butter sauce until thick and creamy. Once finished pour it over the veggies and mix well together. Feel free to sprinkle sesame seeds and almond slices on top to finish it off!

For some protein, I added in shrimp that I just sautéed in the same pan real quick after emptying the veggies into their bowl. Feel free to use any protein that you favor, chicken, beef, tofu.....totally up to you! Or keep it completely all veggies - your choice! Either way, this dish was delish! Plus we had more than enough for leftovers the next day.....SCORE!! You can also keep it in the fridge for a few days. I will admit that it tasted better freshly cooked but it was still great for a leftover!
Enjoy! Feel free to comment or share!
xo - cherise
Ingredients:
1 orange & red pepper chopped (add yellow too!)
1 onion chopped
2 large zucchini - spiralized
4 large carrots - spiralized
Almond Butter Sauce:
1/4 cup almond butter (I love the fresh grind option my local Whole Foods has)
1/2 cup broth (I used vegetable to keep it vegetarian but you can use chicken)
1/4 cup oil (sesame would go great, I used EVOO and it worked fine)
1 Tbs coconut flour
1/4 cup coconut aminos
2 Tbs apple cider vinegar
2 garlic cloves - chopped (I sometimes use frozen cubes for faster prep)
1 Tbs fresh lime juice
Instructions:
1. In a large pan add the oil over medium-high heat
2. Add in peppers and onions - cover to have them cook faster and soften up a bit.
3. Then add the carrots and cook for a few minutes before adding in the zucchini.
4. Once cooked through remove from pan and add to a large bowl so the zucchini stops cooking.
5. You can start the almond butter sauce while the veggies are cooking. Bring all ingredients for the sauce to a low simmer until smooth & creamy.
6. Once the sauce is done pour it over the veggies and mix well to combine.
7. Add in any protein if you wish.
8. Top with sesame seeds and/or almond slices to finish it off!
9. Enjoy!
*recipe adapted from rachlmansfield.com
Healing Crockpot Vegetable Soup


Soups are my go-to in cooler months. You can make a big batch for a family dinner and still have leftovers for lunch the next day plus they freeze well for later consumption.
I prefer to make my own (plus it is super simple) as I can use my favorite ingredients and watch the sodium intake too. Most conventional soups have a higher amount of sodium or use a cheaper broth to keep cost down (understandable) but for me, I want the best for my body and my family! I always go for organic low sodium broth (you can make your own too, I have yet to venture in that direction! lol!)
This veggie soup was born out of the arctic temperatures we have been enduring here in Jersey and some leftover frozen veggies (peas!) I wanted to use up. Yes, frozen veggies are great to use, they are picked and frozen at their peak and also check that no other ingredients are added in. I had a bag of frozen peas I was wondering what to do with and decided to make this soup!
I also added in white sweet potatoes, red pepper, my go-to mirepoix blend (carrots, celery, and onion) turmeric, and my favorite seasoning from Trader Joes, 21 Seasoning Salute, and vegetable broth. Feel free to add your favorite spices even fresh is better! That is what I love about cooking, you can add your own take on recipes to cater them to your liking! Throw it all in your crockpot (or instapot - next gadget on my list to get!) and let it cook and watch how your house smells amazing too!
If there are other veggies you wish to swap then go for it! Make it your own special way. I had this for lunch for a few days and even froze more for a quick weeknight dinner! You know what goes good with this....my paleo corn bread!
I am literally eating my leftovers for lunch as I write this blog! Yum!!

Ingredients:
2 small white sweet potatoes cut in quarters (or any potato variety you like)
Mirepoix blend (I find mine in the freezer section) or;
2 cups organic carrots chopped
4 celery stalks chopped
1 onion diced
1 red bell pepper diced
1 cup frozen peas
2 garlic cloves minced
4 cups organic low sodium vegetable stock
Sea salt & pepper to your taste
1 Tbs 21 Seasoning salute (or similar spices)
1 Tps turmeric
Instructions:
1. After all the veggies are chopped and prepped add them to the crockpot with the vegetable broth.
2. Cook on low for 6-7 hours or high for 3-4.
3. Check for seasoning and adjust to your liking.
4. Store in fridge for 4 days or freeze for up to 6 months.
Enjoy!
Tasty & Sweet BBQ Cauliflower
Cauliflower is having its moment right now in my house as it so versatile from a great side dish to be the star of the show! With plant-based options becoming more widely popular in restaurants I often see cauliflower as a 'steak' menu item and this intrigued me!! Not that I was ever a steak eater but seeing this option made me happy! It looks like we are really starting to make that shift to be more conscious of the benefits of a plant-based lifestyle!
Now when you hear cauliflower steak it may sound strange but these thick slices of cauliflower slathered in my tangy BBQ sauce are quite the flavorful surprise! You can cut the cauliflower into thick slices or make them smaller depending on your preference. They tend to break easily so don't get discouraged as the taste is the same either way!

As you can see mine are all different sizes! (it is a work in progress lol!) I accompanied mine with quinoa and mixed in fresh spinach to wilt at the end. There were extra sauce drippings in the pan after roasting and you better believe that I added that right into the quinoa for that added tangy and sweet flavor throughout! These can be served on their own as a side dish (maybe add some healthy blue ranch dressing!) or make it into a meal like I did - love how versatile they are!
Would love to hear your comments and please share!
xo - cherise

Ingredients:
1 medium cauliflower head (sliced thick for steak or cut into florets)
2 Tbs Olive Oil
4 Tbs coconut aminos (I use this one)
3 tbsp organic tomato paste (no salt added if possible)
2 tbs raw honey
1/2 tbs garlic salt
1 tsp onion powder
1/2 tsp smoked paprika
1 tbs apple cider vinegar (I love my Braggs!)
Instructions:
1. Preheat oven to 375f.
2. Lay parchment paper on a rimmed baking sheet.
3. In a large bowl mix all the BBQ sauce ingredients well.
4. Toss in the cauliflower and coat well and even with the sauce.
5. Spread the cauliflower on the pan evenly with all the drippings.
6. Bake for 30 minutes and toss once or twice during cooking time - the cauliflower should soften and get crispy brown when done.
7. Server over quinoa or as a side dish.
Enjoy!
xo - cherise


Mediterranean Burger
As I continue on my plant-based journey I had to get creative with BBQ night. Where once before I indulged in either grass-fed burgers or homemade turkey burgers I now opt for a homemade Mediterranean burger! I must say they came out pretty darn tasty too!
My family looks at me like I am nuts, wonder when this phase will end but I must admit I am feeling good and not missing animal protein as this present time (this is not to say I will always feel this way - disclaimer! lol)
To make them in such perfect round patties I used these egg molds! They work perfectly for all things round! Cookies, bread, pancakes......versatile! I like them to look neat and round and this way I keep the portion size perfect too! See...how perfect!!

Just look at all the pretty colors in there! You know you are getting a rainbow of nutrition with these bad boys! Think sundried tomatoes, fresh spinach & herbs of your liking to make your taste buds explode with flavor! Who says eating plant-based is boring?! When you open your mind to the possibilities of what you can make with your food options, it becomes a lot more fun and creative to eat! Oh and sooo not boring!

In a blender, I added chickpeas (great source of fiber & protein), farro (you can also use quinoa) and old-fashioned rolled oats as my base. Then you get creative and add your favorite veggies - this is where I added sundried tomatoes, feta, olives, and spinach. Top it off with fresh herbs as parsley and cilantro and you got yourself a Mediterranean Burger, my friends!

Now here is where you really get creative and add some yummy toppings! Over salad, on a bun with tomatoes, spread avocado slices on it....the possibilities are endless but ever so yummy! How would you eat your Mediterranean burger - share below! I am always looking for new ways to enjoy a good ol' burger - a veggie burger that is!
1/2 C uncooked farro
1 C old fashioned oats
1 15oz can chickpeas (rinsed)
1/4 cup sun-dried tomatoes (not packed in oil)
2 Cups fresh spinach (cooked and wilted down)
1 large egg
1/4 C crumbled feta (omit if vegan)
1/4 C pitted olives - chopped
2 cloves garlic minced
1/2 tsp salt and pepper
1 Tbs chopped fresh parsley & basil
1/2 tsp oregano
Directions:
1. Cook farro in 1 cup water (according to package directions) Once cooked set aside.
2. While cooking place sundried tomatoes in hot water to let rehydrate.
3. In a food processor, mix farro, chickpeas, oats, garlic, oregano, S&P. Blend mixture well then add an egg to blend again.
4. Transfer to a bowl and add in sun-dried tomatoes, cooked down spinach, olives, feta and fresh herbs.
5. Use egg molds or hand to make 4-6 patties - depending on how thick you make them.
6. Drizzle heated skillet over medium heat and cook veggie burgers on both sides until browned and cooked through - about 8-10 minutes total.
7. Serve on buns, over salad, or however you wish!!!
Black Bean Veggie Burgers

I do love me a veggie burger but some are loaded with soy and other ingredients that I just do not like. There is a brand called Hilary’s that I do enjoy that has readable ingredients and come in a few flavors that are soy free and dairy free. But sometimes I just like to make my own and this way I have a batch to eat for lunch or can freeze for later eating!
I came across this recipe from Wellplated.com and it was different from others that I have seen. The ingredient list had a bunch of superfoods that I would have never thought to add to a veggie burger like hemp seeds and pumpkin seeds! I was intrigued! Needless to say, they turned out great and oh so delicious!! I thoroughly enjoyed my lunch this past week as I paired the burger with mixed veggies and a little goat cheese sprinkled on top. mmmmm good!

Other toppings that are good to try are avocado, sliced tomatoes, mustard or plain yogurt. Check out the recipe and share if you give them a try!
Black Bean Veggie Burgers
Recipe here
Ingredients:
• 1/2 red onion chopped
• red pepper chopped
• 1/2 cup raw almonds
• 1/4 cup pumpkin seeds
• 1/4 cup Bob’s Red Mill Hulled Hemp Seed Hearts
• 2 tablespoons chia seeds or additional hemp seed hearts
• 2 cloves garlic
• 1 tsp sea salt
• 1 1/4 tsp cumin
• 3/4 tsp chili powder
• 1/4 tsp smoked paprika
• 1 (15 oz) can black beans, drained & rinsed (watch for sodium count)
• 1/2 cup rolled oats
Directions:
1 Preheat oven 350 degrees
2 Line baking sheet with parchment paper
3 Place chopped red pepper and onion in food processor and blend until minced.
4 Transfer to mixing bowl.
5 Add almonds, pumpkin seeds, hemp seeds, (chia or additional hemp seeds) garlic, salt, cumin, chili powder, and smoked paprika to the processor and blend well. Transfer to mixing bowl.
6 Add black beans, oats and 2 tbs water to a processor and blend until beans are chunky and smooth.
7 Transfer to mixing bowl and mix together well.
8 Shape into 6 patties and place on baking sheet.
9 Bake for 20 minutes, flipMoroccan Style Veggie Pitas

We eat what we crave, right?!
Veggies play an important role in our everyday diets and yet we don’t consume as much as we should. So let’s make them more and this dish is super simple and quick, I promise! With veggies being the main course here I know my family and I are getting a good serving! The great thing about this dish is that you can swap any veggie you wish. I used zucchini, squash, red onion, cauliflower, and chickpeas. Peppers would make a great addition as well (this family is not a big fan of peppers, sorry!) To really spice things up I used Moroccan flavored spices which is what makes this recipe so tasty – and the leftovers are just as delish!
Secret Shortcuts
Veggies are best fresh but let’s be honest cutting up a big head of cauliflower is a daunting task (at least for me it is!) You may be able to find cauliflower florets already pre-cut but these are usually pricey plus depending on when they were cut they start to lose their vitamins and nutrients right away. I used frozen cauliflower florets for this dish and they tasted just as good. All the other veggies were fresh cut. After cutting all the veggies I add them to a big bowl and shower them with all the seasonings and avocado oil.
For faster clean up I line a baking sheet with foil, spray the foil and then dump all the veggies onto it – spreading them out evenly. Love seeing all the colors they show off! You just know it’s going to taste good and be good for you too! Grab some Tzatziki sauce from Le Grand to top them off with or you can make your own version with greek yogurt. Stuff it all into a warmed up pita or just grab a fork and dig in! Great for those #meatlessmondays!!!
For faster clean up I line a baking sheet with foil, spray the foil and then dump all the veggies onto it – spreading them out evenly. Love seeing all the colors they show off! You just know it’s going to taste good and be good for you too! Grab some Tzatziki sauce from Le Grand to top them off with or you can make your own version with greek yogurt. Stuff it all into a warmed up pita or just grab a fork and dig in! Great for those #meatlessmondays!!!

Ingredients
• 14 oz can chickpeas (drained and rinsed)
• 1 squash (sliced into half shaped moons)
• 1 zucchini (sliced into half shaped moons)
• 1 red onion (diced small)
• 3 cups cauliflower florets (if frozen thaw a little first)
• 1½ tsp smoked paprika
• 1½ tsp cumin
• 1½ tsp garlic powder
• 1½ tsp salt
• 2 tbsp avocado oil (or olive oil)
Directions
1 Preheat oven to 400 degrees
2 Add cut up veggies to a large bowl
3 In a small bowl combine the seasonings and mix well
4 Pour seasoning mix over veggies and mix thoroughly
5 Spread evenly onto greased or lined baking sheet
6 Bake for 20 minutes
7 Toss, bake for another 10 or until veggies are tender
8 Warm up pita bread and stuff it in (we used pita pockets)
9 Add tzatziki sauce on top
10 Enjoy!
*recipe adapted from www.joyfulhealthyeats.com
Tequila Lime Avocado Salad!!
 With the weather finally warming up here in Jersey I get excited to start BBQ’ing and thinking of new healthy(ish) types of cold salads to make and to bring to parties. I own this bottle of tequila called 901 (for those of you who know me know that I am a huge Justin Timberlake fan and this is his line of tequila) Anyhoo, I have yet to really use it and I happen to have a bunch of limes on hand so I put the two together and voila! Tequila Lime Avocado Salad! I checked my kitchen to see what I could add and I found black beans, avocado, limes, threw in some fresh tomatoes and cucumbers and added some fresh parsley, S&P some Italian spices and EVOO. (ok I found a lot!)
The tequila is not too overpowering but adds a nice zing to it! If you are not a drinker – then just skip it. It will still be delicious! Plus swap and add any ingredients you have on hand or prefer!
I started with dicing up the veggies and getting the avocado ready to slice. I love Target’s Simply Balanced Organic Beans (they have different types of beans) plus they are not in a can, bonus!!! Take a look at the nice 901 tequila bottle!! (told you I was a fan!)
After chopping up the veggies, dicing up the avocado, draining and rinsing the beans I threw them in a big bowl and mixed it all together.
Don’t you just love a fresh green looking avocado?!

Also, had to share the EVOO that I use – had this in Eataly in NYC and it was delicious! If you are ever in NYC you must check that place out!

Added the tequila and EVOO, cut and squeezed the limes (I so need to invest in that lime squeezer thingy!) Sprinkled on the spices.

Here is all the yummy goodness mixed together. Serve right away so the avocado doesn’t turn too brown. Enjoy and let me know what you think or if you used other ingredients.
1-pint cherry or mixed tomatoes, chopped
1 cucumber diced
1 can or box beans (I used black)
1 avocado diced
2 limes
2 tsp Tequila
2 TBS EVOO
S&P to taste
Fresh parsley, basil (any Italian seasoning will do)
Directions:
• Add chopped veggies, avocado drained and rinsed beans to a big bowl
• Cut and squeeze limes over the bowl (this will also help keep the avocado from turning brown)
• Add the Tequila and EVOO
• Season with spices
• Toss gently to coat everything
• Chill for a few minutes to let the flavors hang out and get to know one another-they like that!
• if serving later or bringing to a party you can add the avocado later
• Serve and Enjoy!!
The wheel is on a spindle, and there is be} a|and there's a} small ball on the wheel. When the wheel is spun, the ball ricochets round and finally involves rest in one of the pockets. There are few educational alternatives for learning how slot machines work in trendy casino environments. The random conduct of slot machines is more 클레오카지노 complicated than most players are conscious. A place to start out|to begin} is improving a common misunderstanding involving the idea of randomness.
ReplyDelete